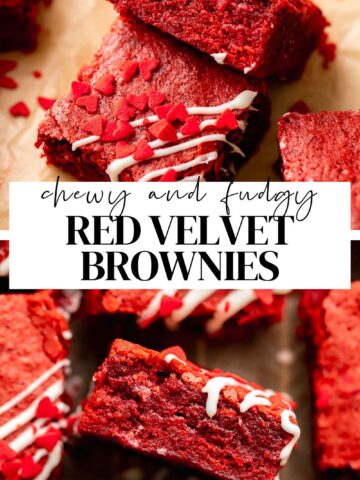
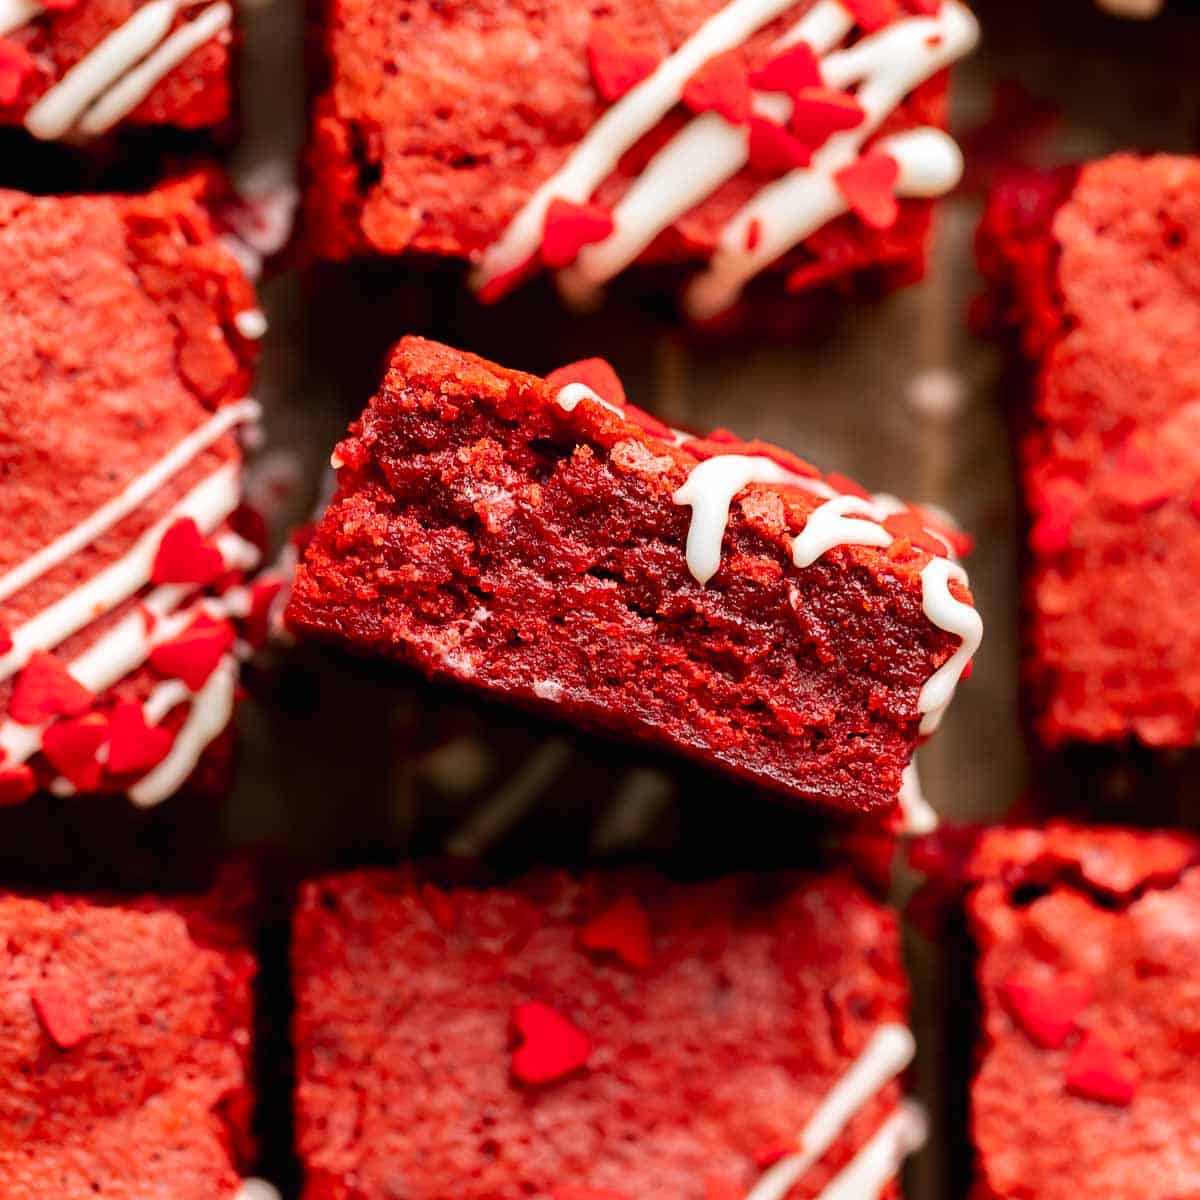
These red velvet brownies are a colorful twist on traditional fudgy chocolate brownies. Inspired by red velvet cake, they have a classic red velvet flavor and a tangy cream cheese drizzle. Decorate them for Valentine’s Day and share them with someone you love!
As a pastry chef, I thrive on challenging myself to reinvent the classics, and these red velvet brownies are exactly that!
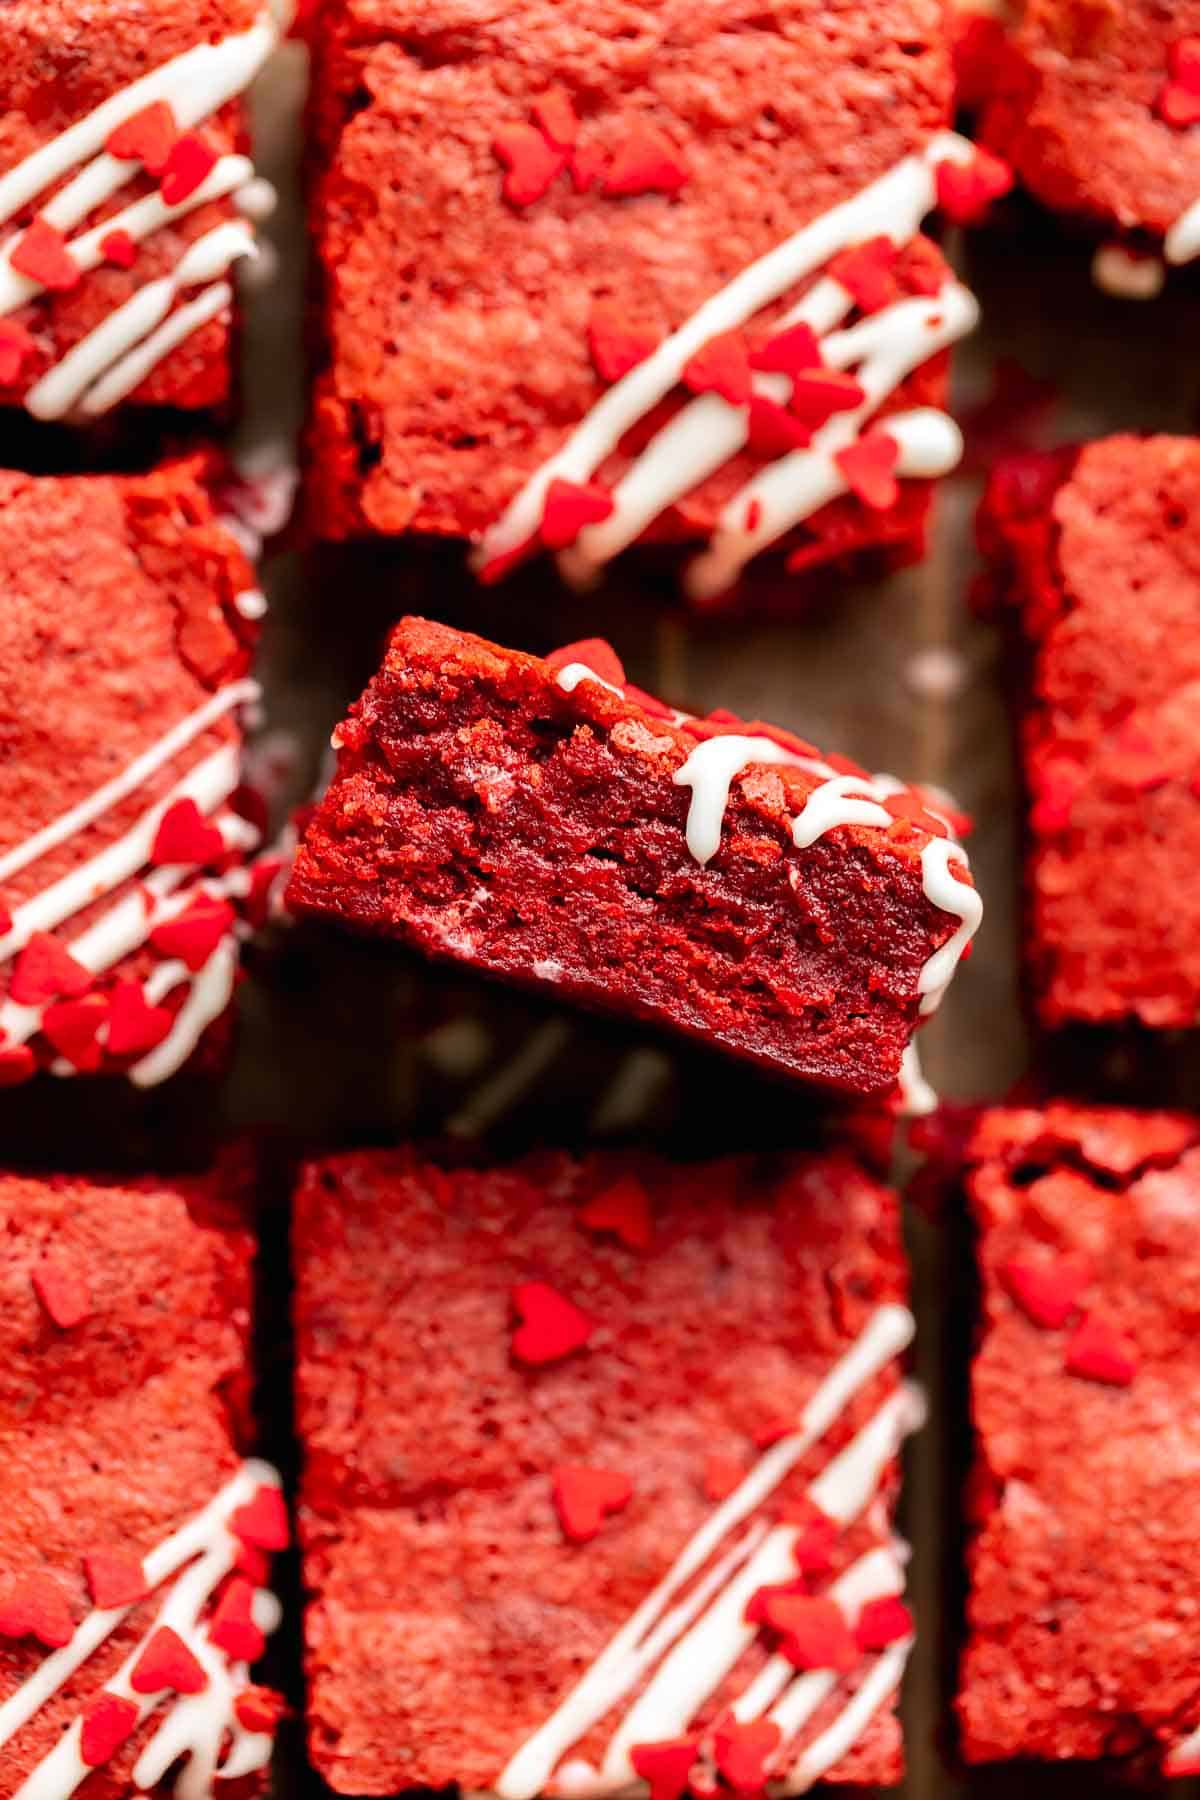
Made with traditional homemade brownie batter tinted a deep red, these brownies have all the same flavors as a red velvet cake but with a chewy and fudgy brownie texture. Drizzle the tops with cream cheese frosting for the ultimate flavor combo!
Big red velvet fan? You must try my red velvet rolls next—they’re like the cake but in cinnamon roll form! Making it for Valentine’s Day? My Valentine’s heart cookies are the perfect festive treat to pair it with!
Table of Contents
Recipe Instructions
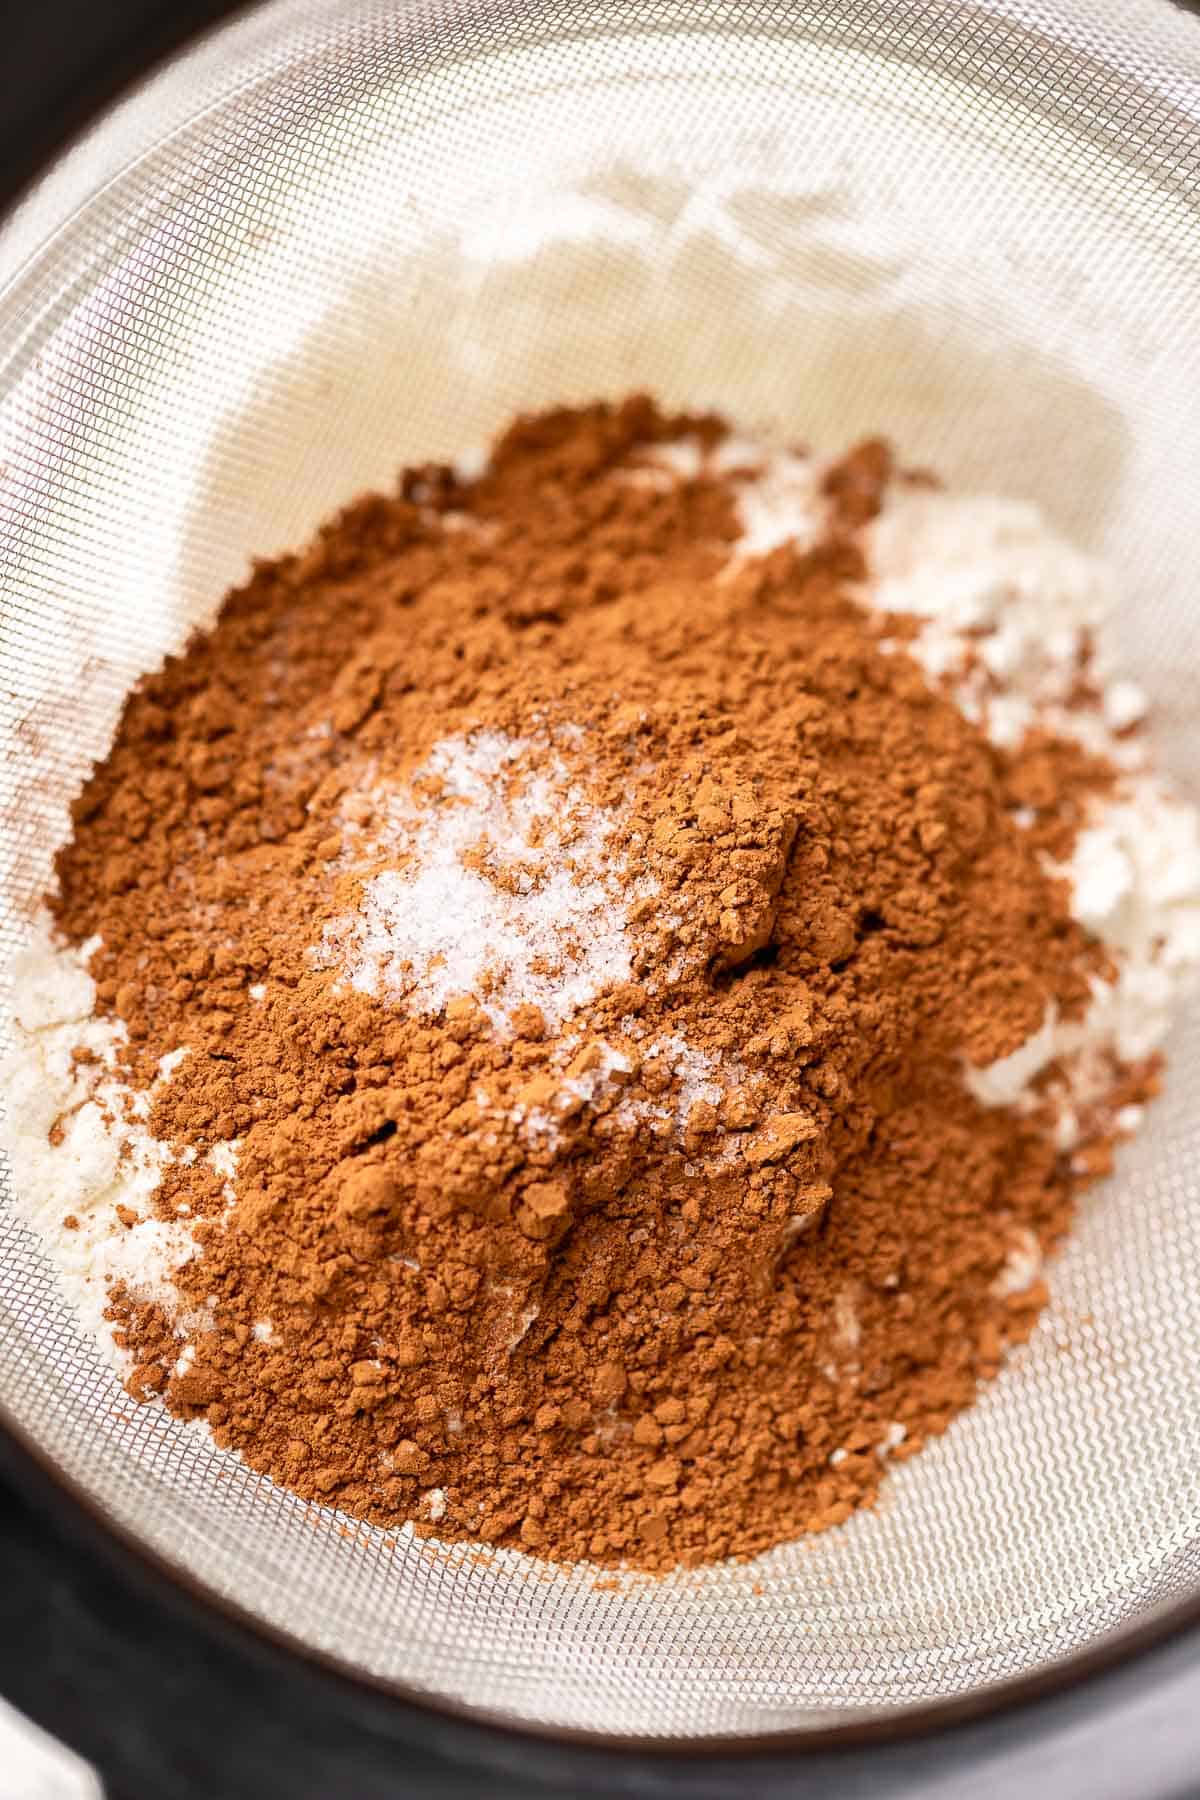
Sift the dry ingredients. Sift the all-purpose flour, cocoa powder, and salt into a bowl and set aside.
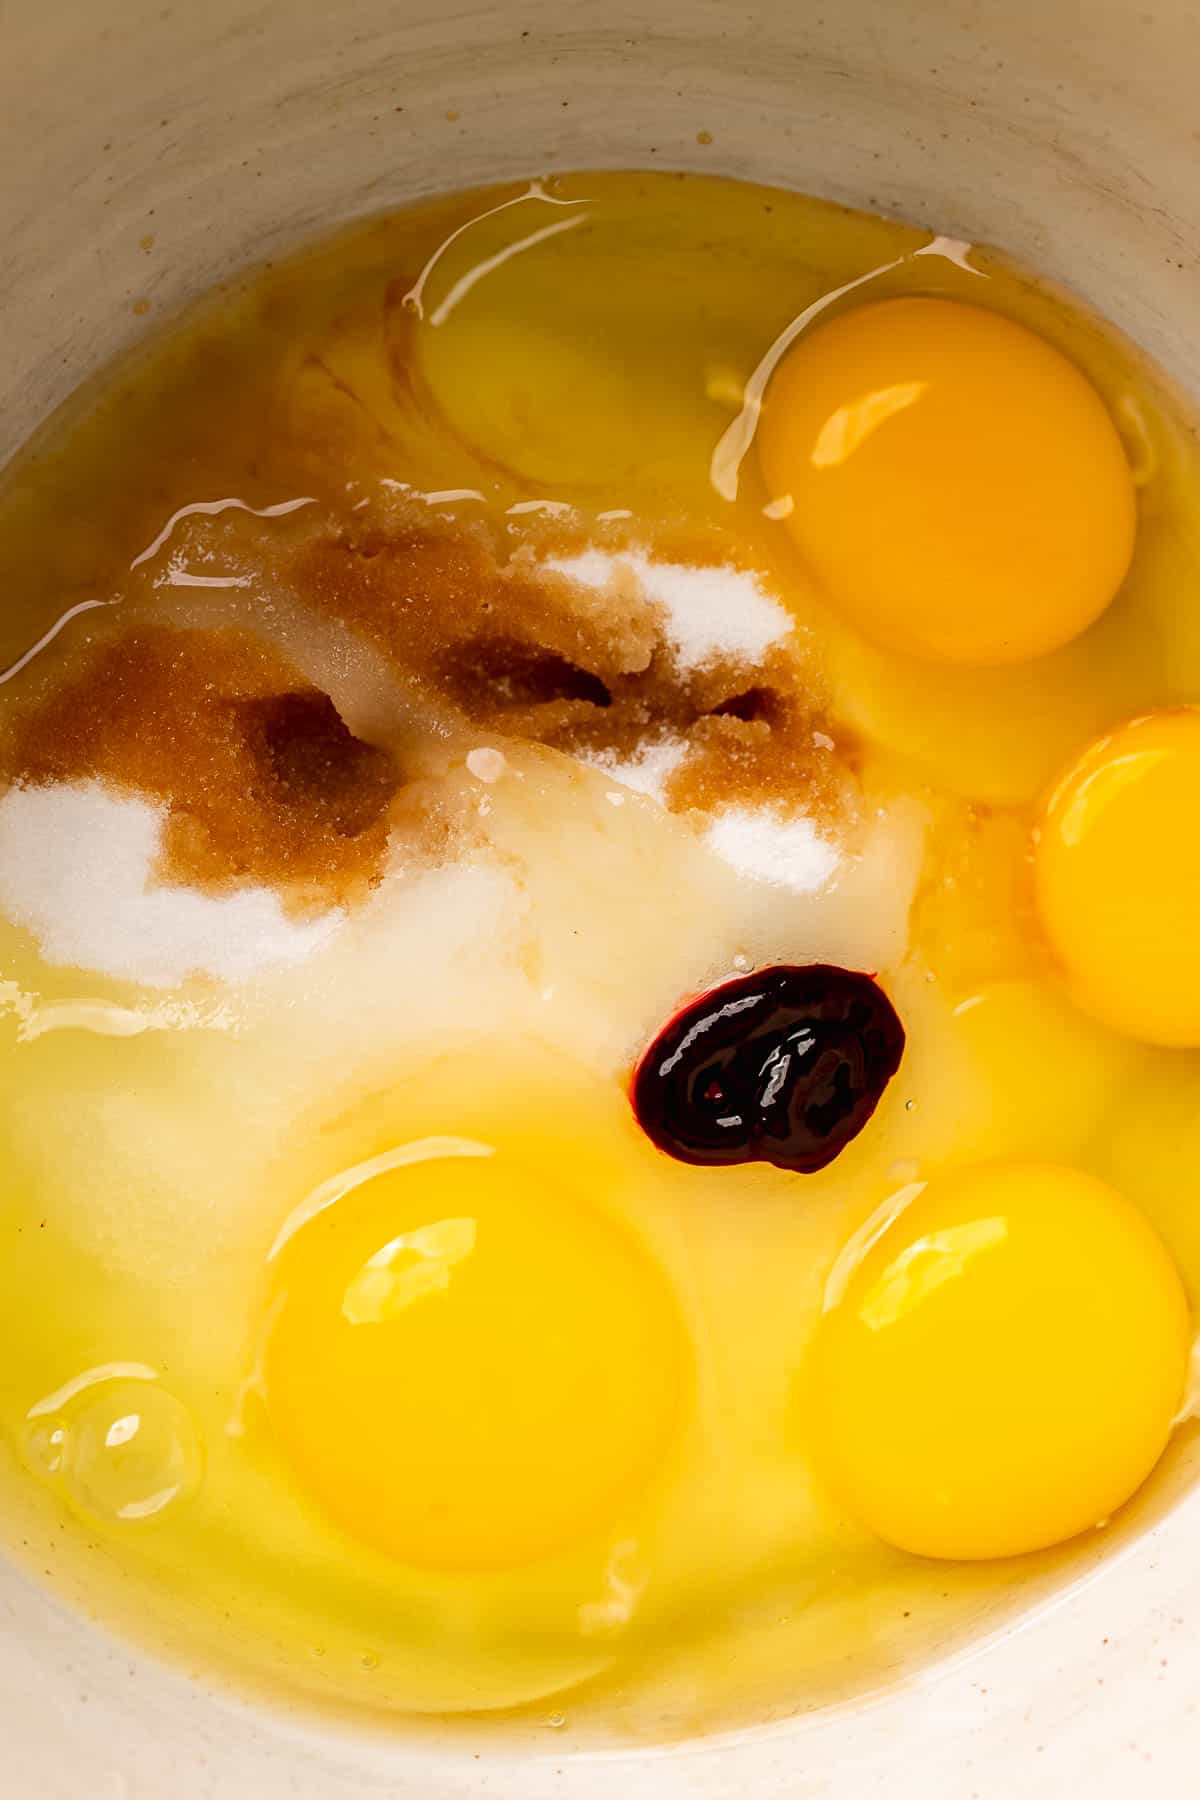
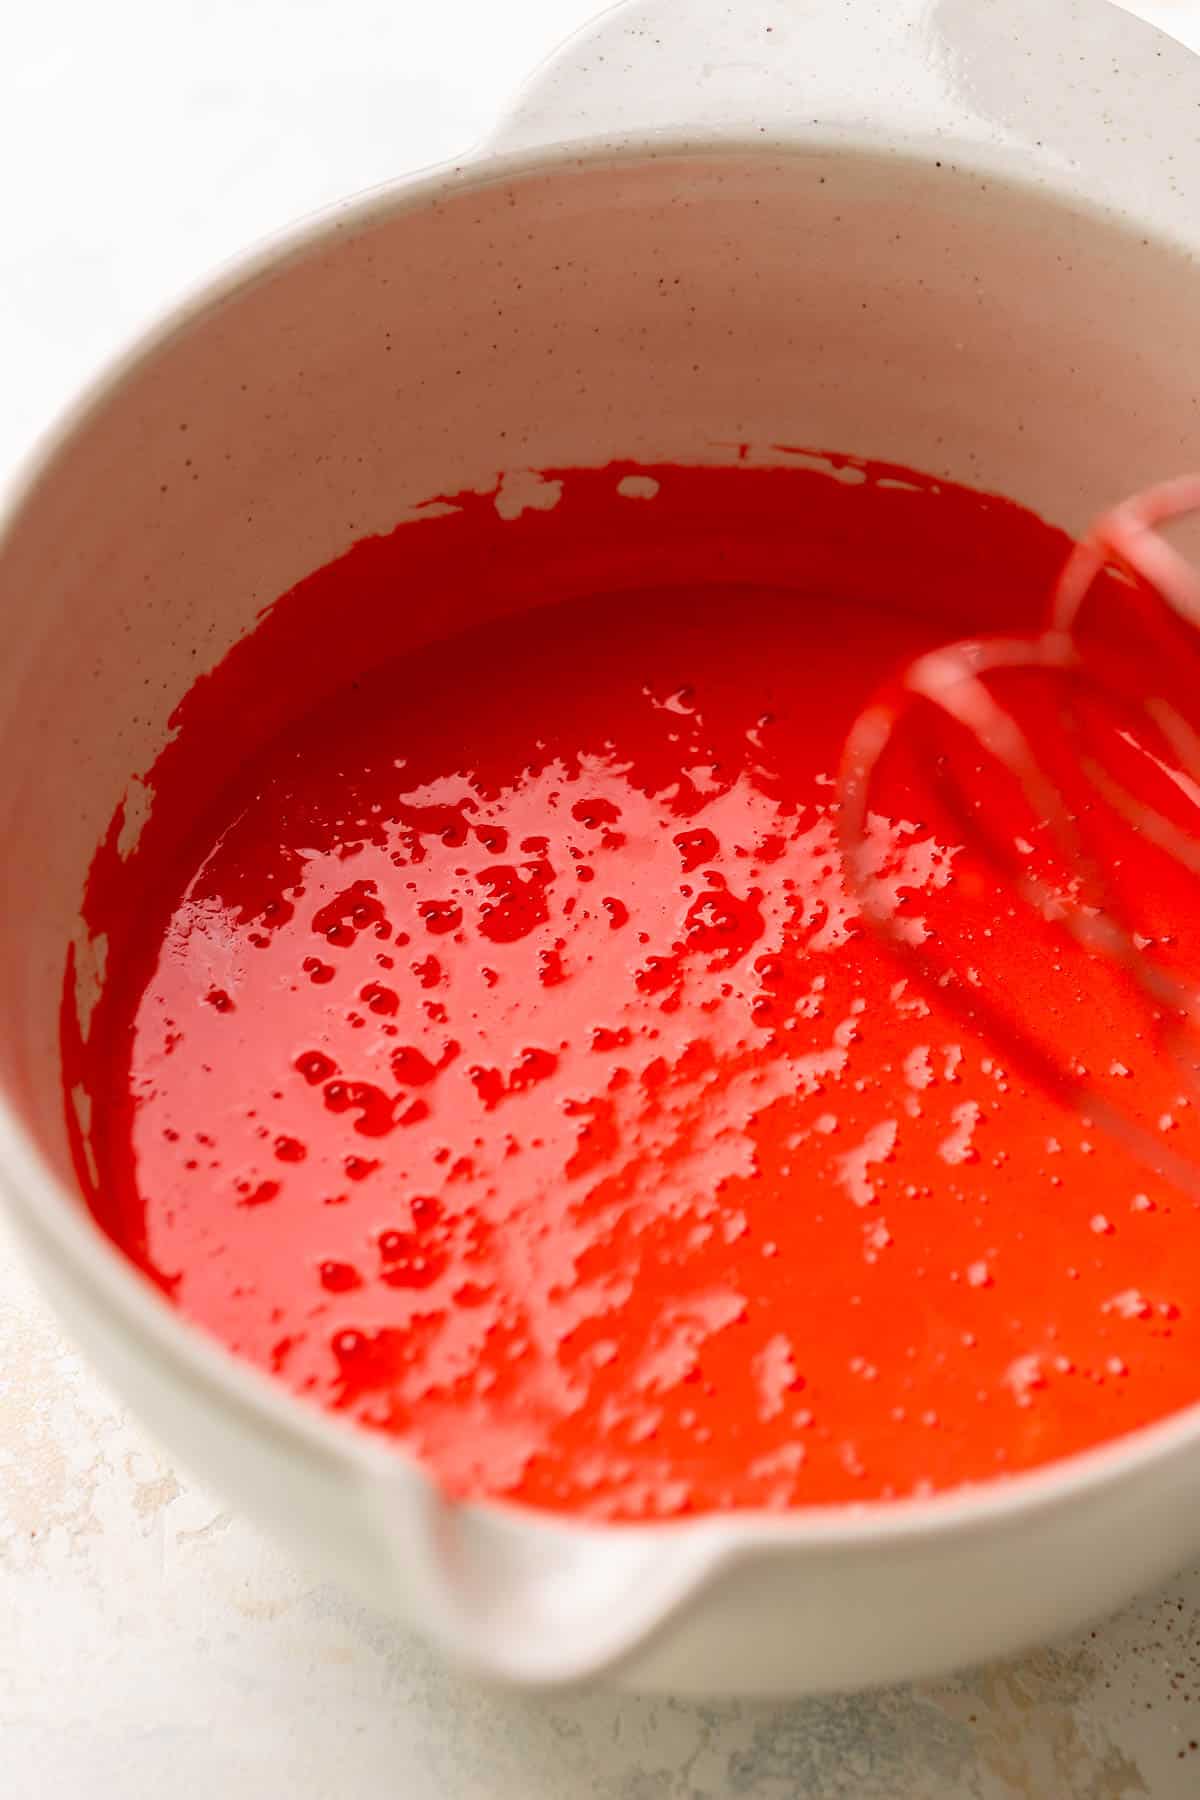
Whisk the eggs and sugar. In a mixing bowl, whisk the granulated sugar, eggs, egg yolk, vanilla extract, and red food coloring until light and fluffy.
Mix in the melted butter and vinegar. Then, mix in the melted butter until just combined.
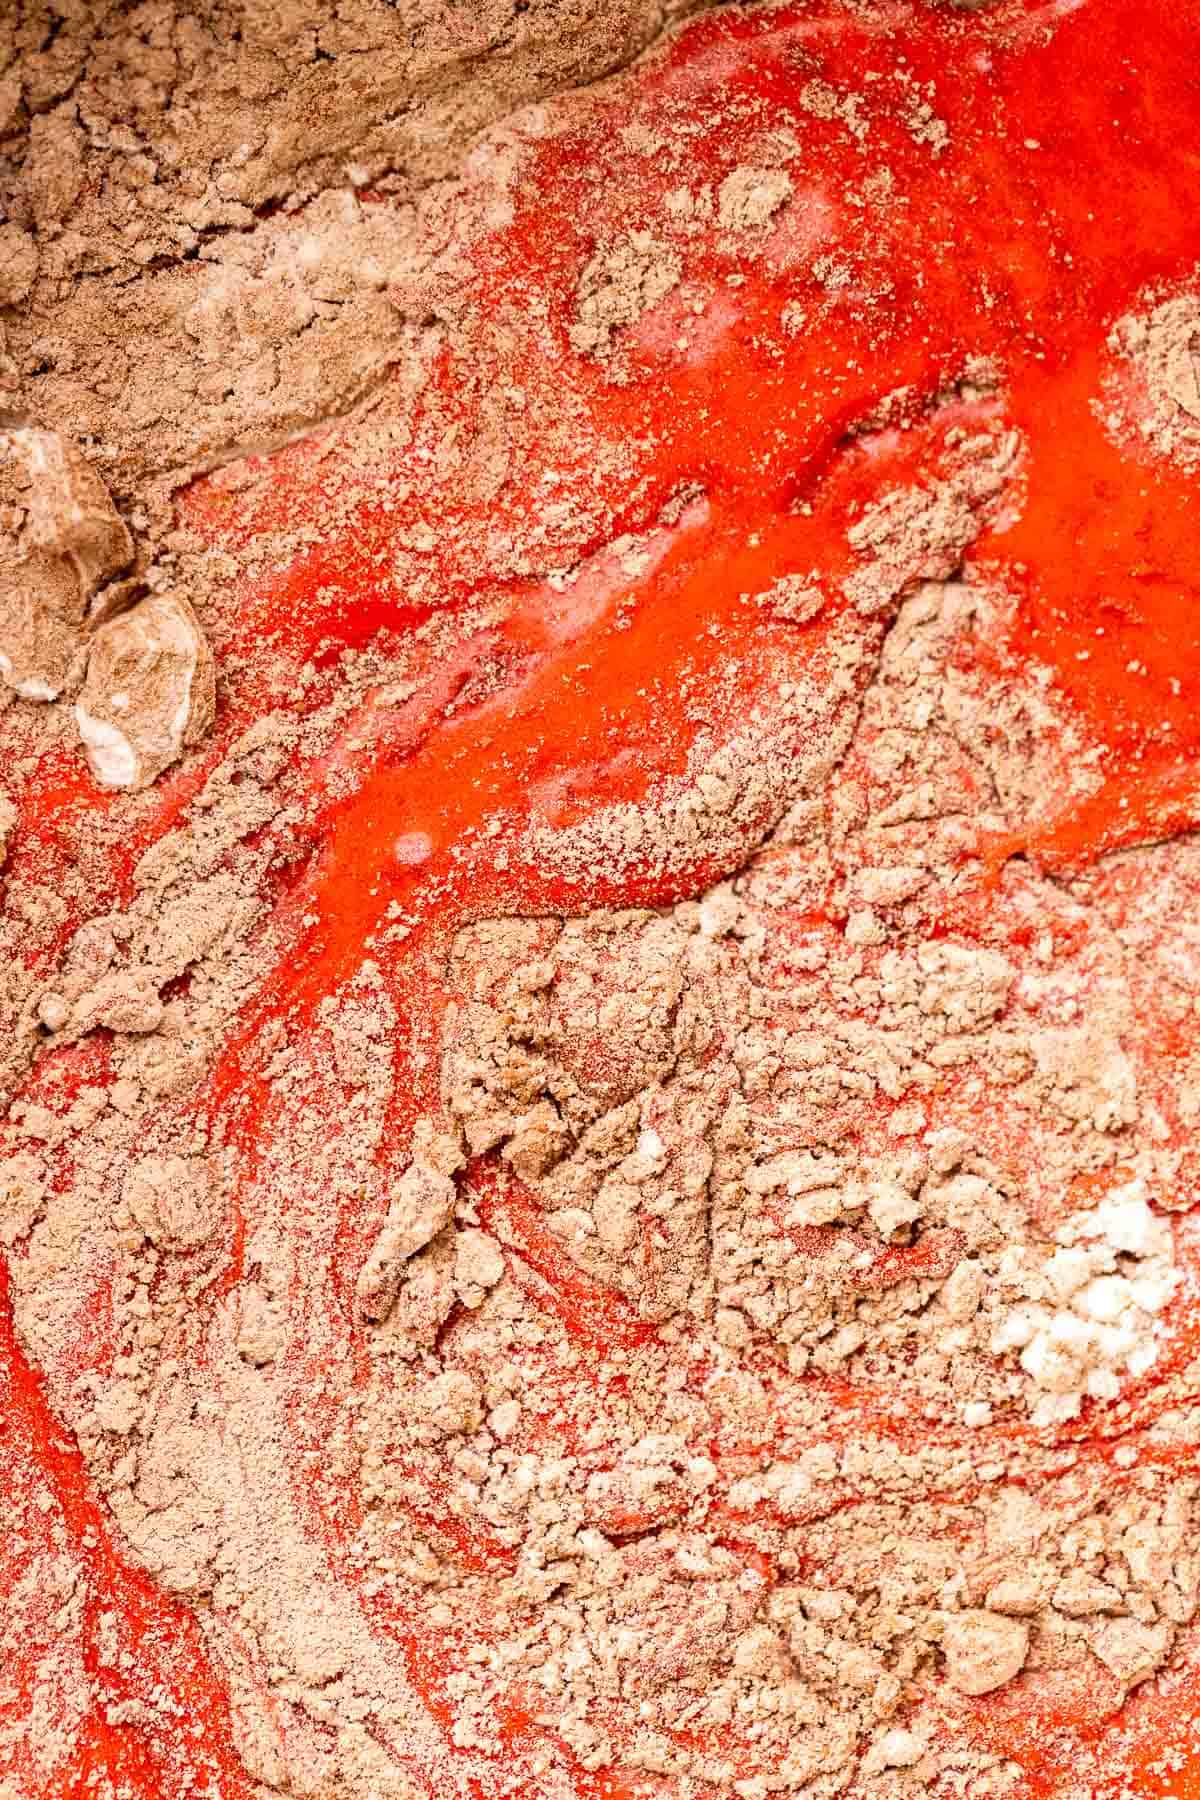
Mix in the dry ingredients. Use a rubber spatula to fold in the sifted dry ingredients. Do not overmix!
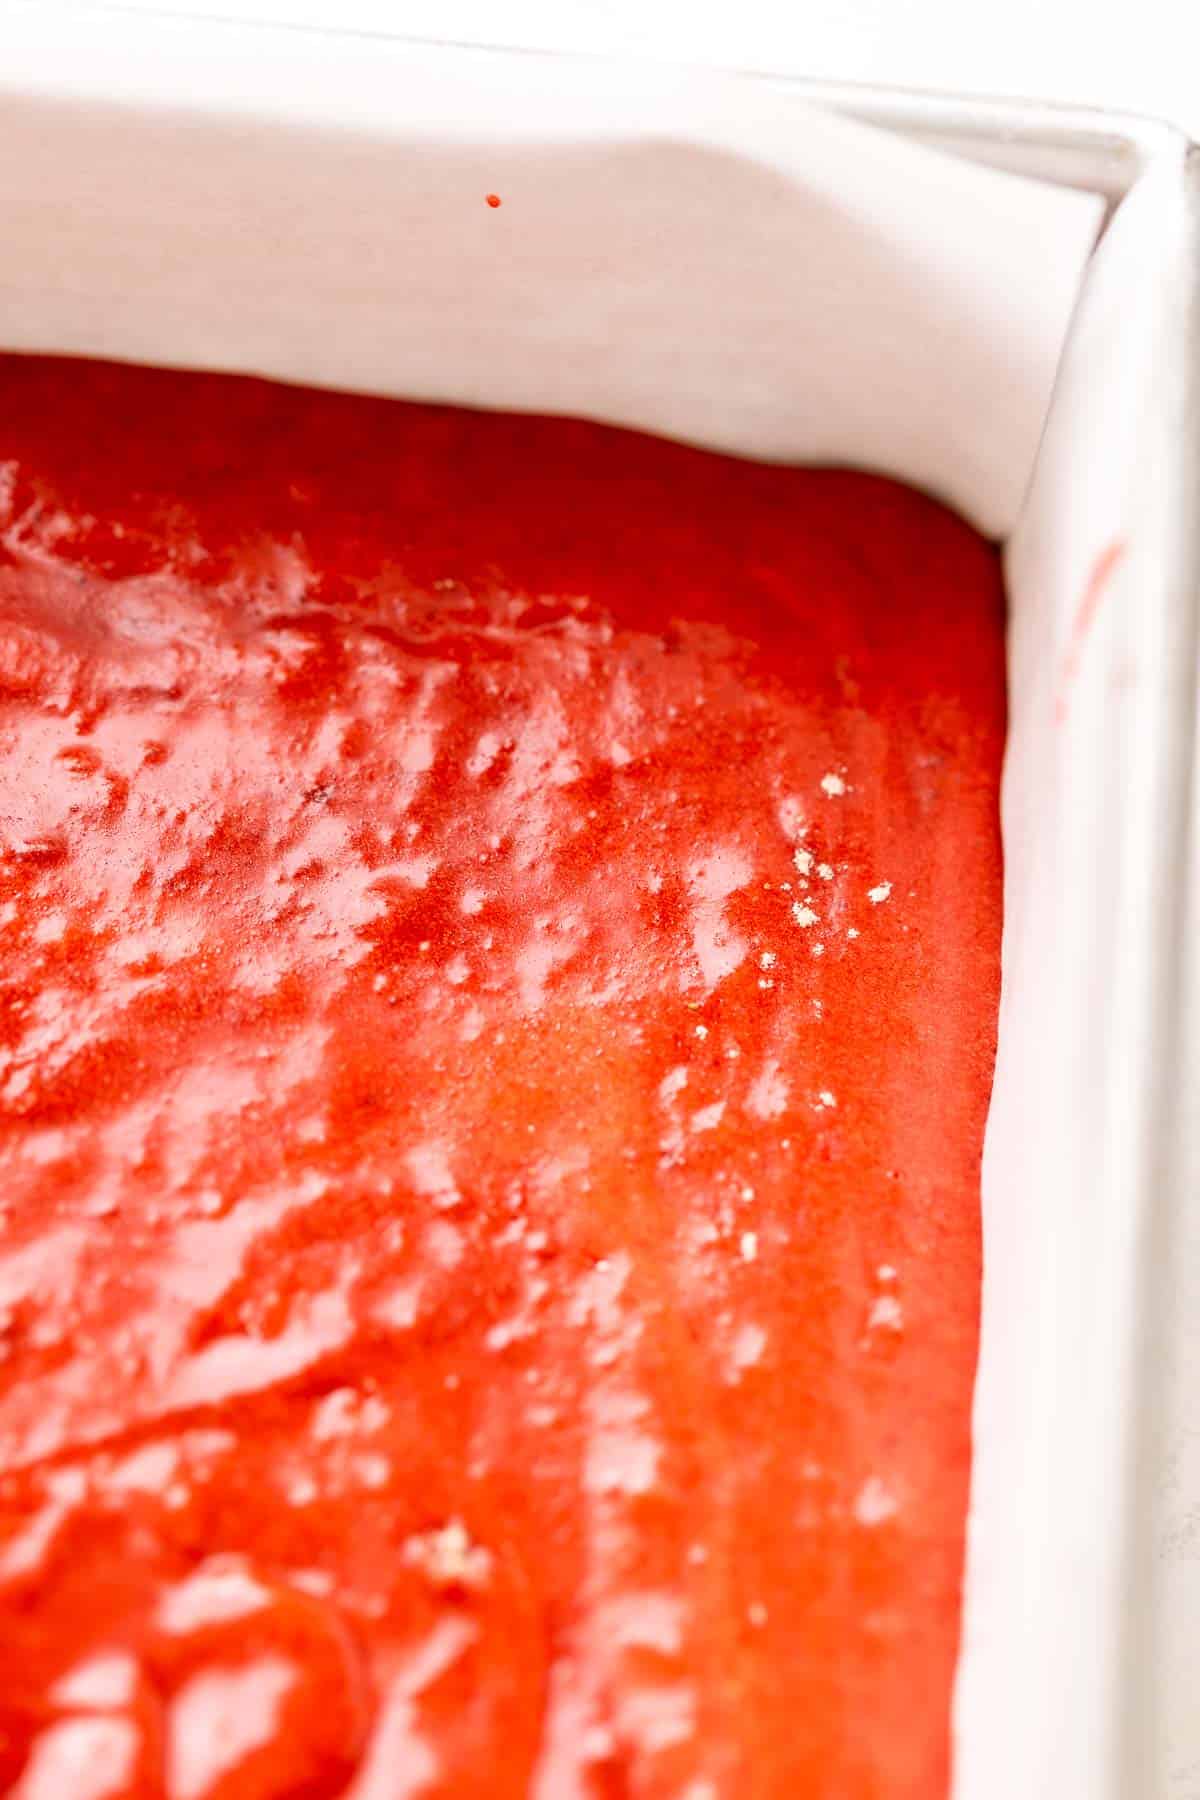
Bake the brownies. Pour the red velvet brownie batter into the prepared baking pan and bake!
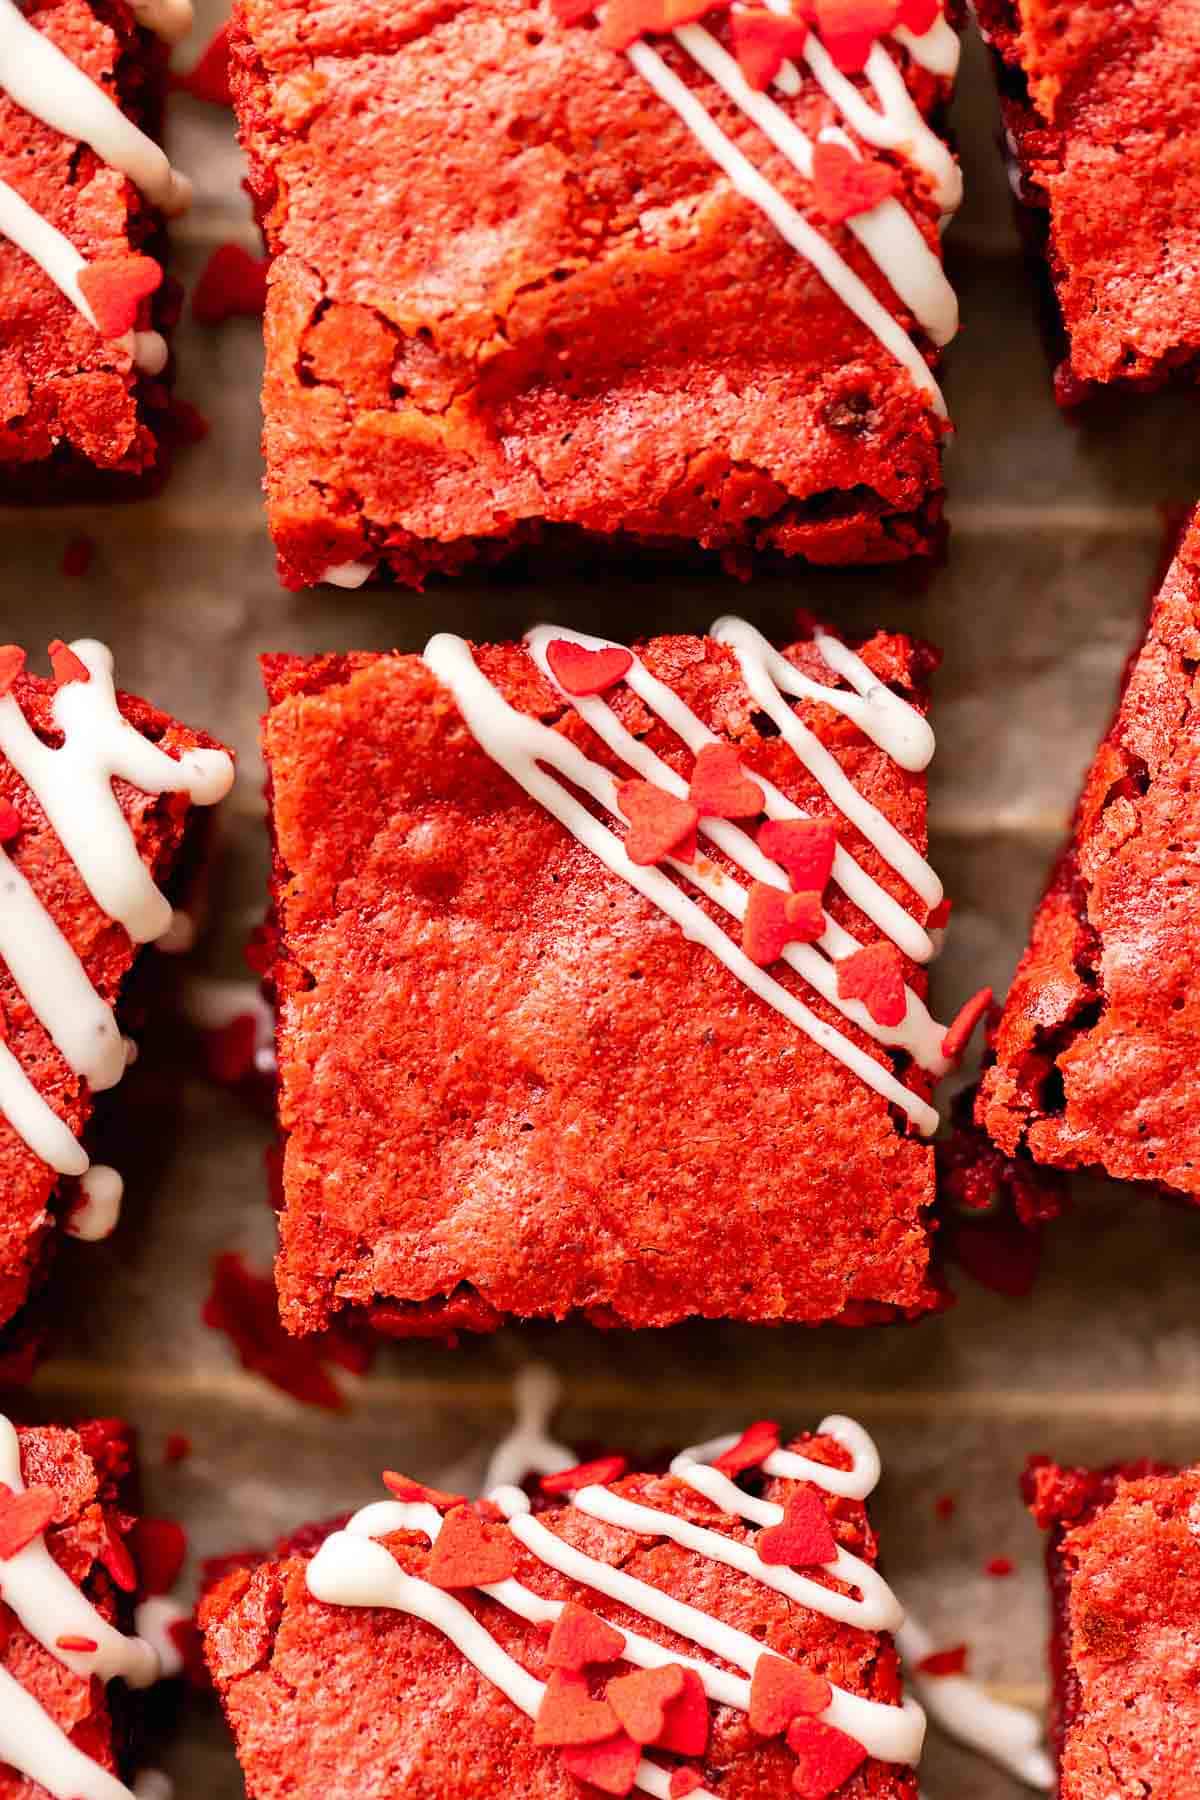
Decorate with cream cheese frosting. Cut the cooled brownies into 16 squares, then use a piping bag to pipe the cream cheese over the corner and cover with heart sprinkles.
Ingredient Substitutions
Cocoa powder: For a bright red color, use unsweetened cocoa powder. The natural red color of the cocoa powder is light enough to maintain the bright red color from the food coloring while still giving the brownies a mild chocolate flavor. Using dark cocoa powder will result in very dark and less red brownies.
Vinegar: A touch of white vinegar is added to the brownie batter for the traditional red velvet flavor. You should be able to get a similar flavor with rice wine vinegar as an alternative.

If you’re as obsessed with brownies as I am, you have to try my cheesecake marbled brownies—the perfect mash-up of creamy cheesecake and fudgy chocolate. And for something extra fun, my M&M brownies are packed with candy in every bite!
If you tried this or any other recipe on my website, please let me know how it went in the comments; I love hearing from you! Also, please leave a star rating while you’re there! You can also tag me on Instagram or Facebook so I can check it out!
Red Velvet Brownies
Equipment
Ingredients
Brownie Batter
- 1 cup + 1 tablespoon all-purpose flour, *see measuring notes below*
- 3 tablespoon unsweetened cocoa powder
- 1/2 teaspoon fine sea salt
- 1 1/4 cups granulated sugar
- 3 large eggs
- 1 large egg yolk
- 2 teaspoon vanilla extract
- 1 teaspoon gel red food coloring
- 12 tablespoon unsalted butter, melted
- 1 teaspoon white vinegar
Cream Cheese Glaze
- 1 1/2 oz cream cheese, softened
- 3 tablespoon powdered sugar
- 1/2 teaspoon clear vanilla extract
- 2-3 tablespoon whole milk
- red heart sprinkles, for decorating
Instructions
- Line a square 8×8 baking pan with parchment paper. Then preheat the oven to 350 F/180 C.
- Sift the flour, cocoa powder, and salt into a medium bowl and set aside.1 cup + 1 tablespoon (133 g) all-purpose flour, 3 tablespoon (16 g) unsweetened cocoa powder, 1/2 teaspoon fine sea salt
- In a mixing bowl, whisk the sugar, eggs, egg yolk, vanilla extract, and red food coloring on medium speed for 2-3 minutes until fluffy and slightly thickened.1 1/4 cups (250 g) granulated sugar, 3 (150 g) large eggs, 1 (14 g) large egg yolk, 2 teaspoon vanilla extract, 1 teaspoon gel red food coloring
- With the mixer running on low, add the vinegar and then stream the melted butter into the batter. Mix until just combined.12 tablespoon (168 g) unsalted butter, 1 teaspoon white vinegar
- Gently fold in the sifted dry ingredients with a rubber spatula until just combined.
- Pour the brownie batter into the prepared baking pan. Bake for 25-30 minutes, or until a toothpick inserted into the center comes out covered in moist crumbs. (In my kitchen, 27-28 minutes is perfect!)
- Let the pan cool completely on a wire rack.
- While it’s cooling, make the glaze.
- Combine the softened cream cheese and powdered sugar. Whisk until smooth and lump free.1 1/2 oz cream cheese, 3 tablespoon (20 g) powdered sugar
- Then whisk in the milk and vanilla until the glaze is thick enough to be piped and hold its shape.1/2 teaspoon clear vanilla extract, 2-3 tablespoon whole milk
- Cut the cooled brownies into 16 squares, then pipe the cream cheese glaze over one corner of the brownie.
- Finish with sprinkles if desired and enjoy!


These brownies are incredible! Made for my friend. I tried one first and they melted in my mouth. Can’t wait for him to try! I am sure he will love them!! Will make again, definitely!
So happy to hear that, Tabitha, thanks for sharing!
Can I substitute heavy whipping cream for the milk in the icing, just reduce a little?
Definitely! Try one tablespoon, and if you’d like the frosting creamier, you can add another tablespoon.
another amazing recipe! i added oreos and they were so delicious. i also added baking powder which made them cakey so i won’t do that again lol
Great recipe.
I doubled the recipe and used a 9×13 pan. It came out a little thinner than I intended. I recommend trippling the recipe. 😊
Can’t wait to try the strawberry blonde brownies!!
Yay! That’s amazing to hear, thanks Lilli!