

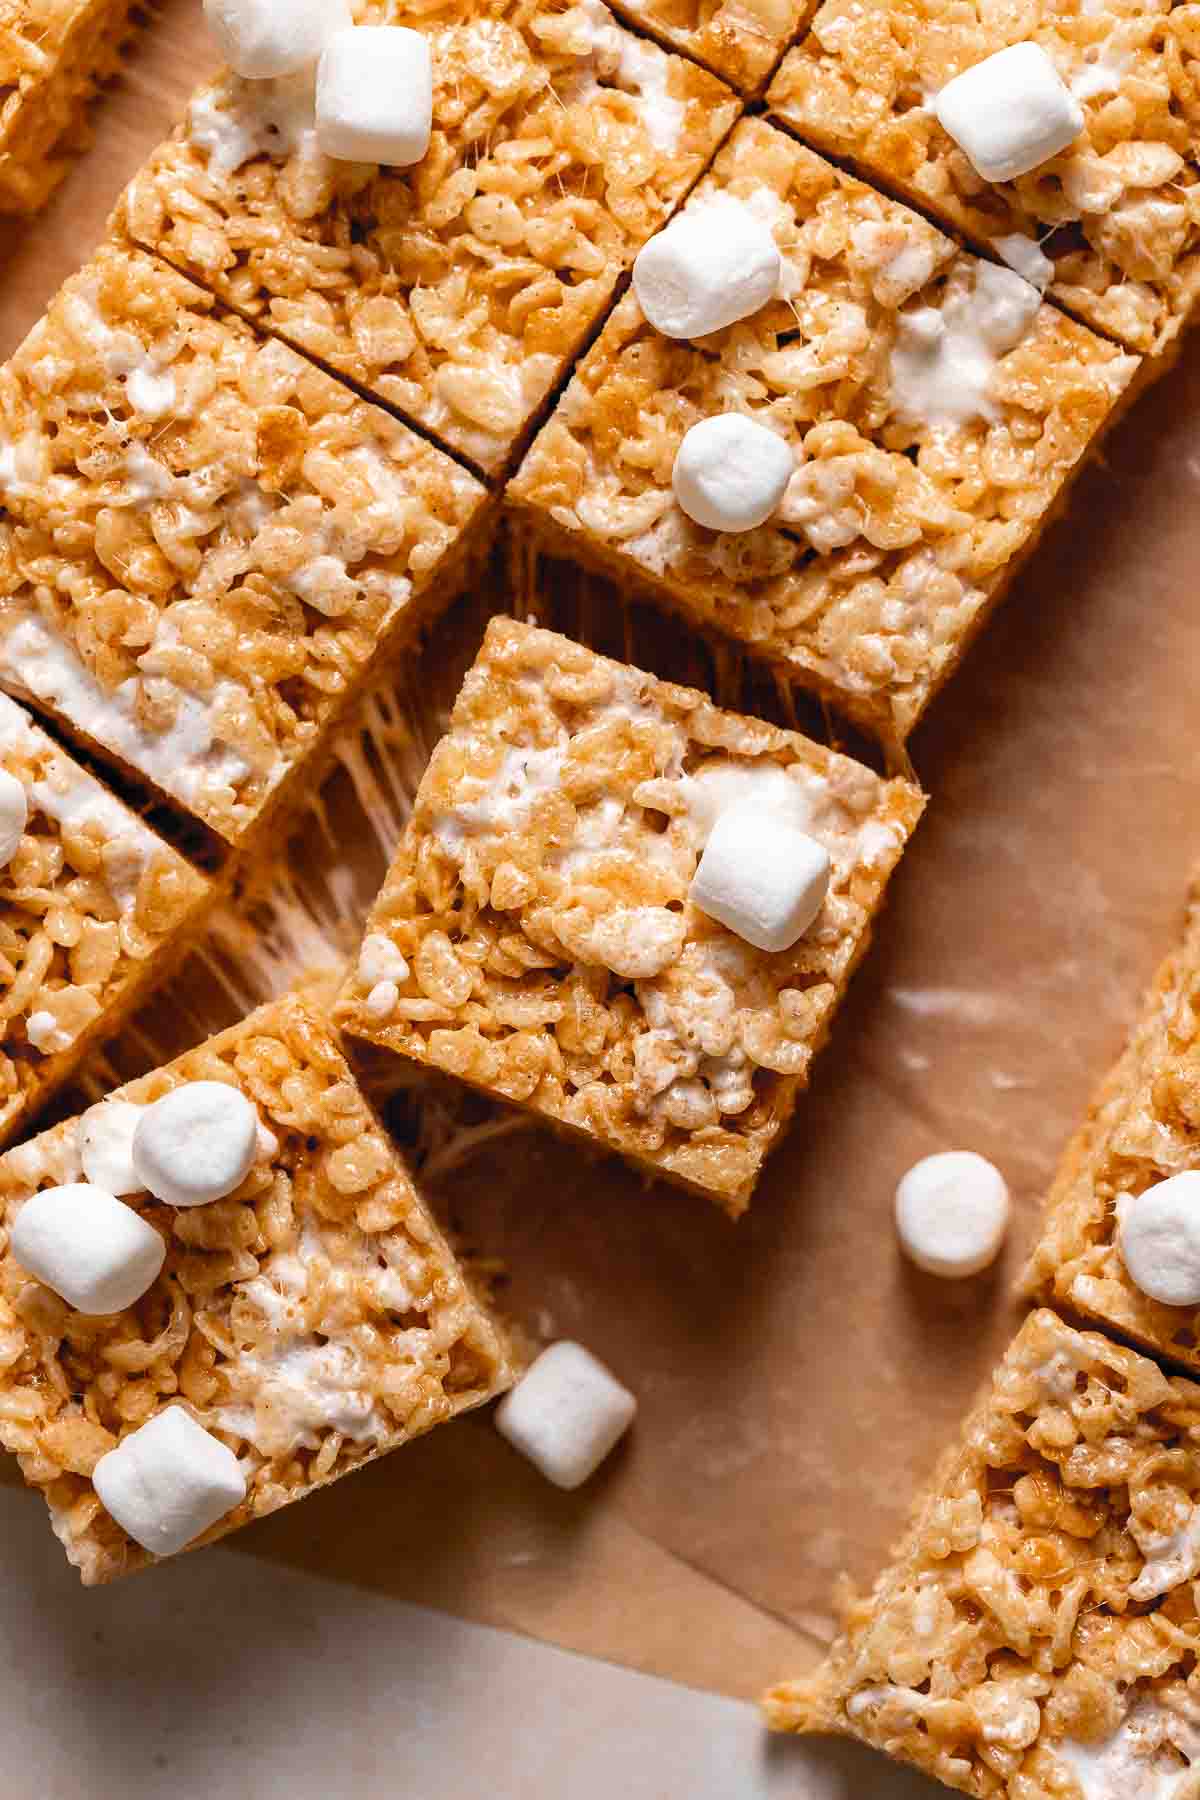
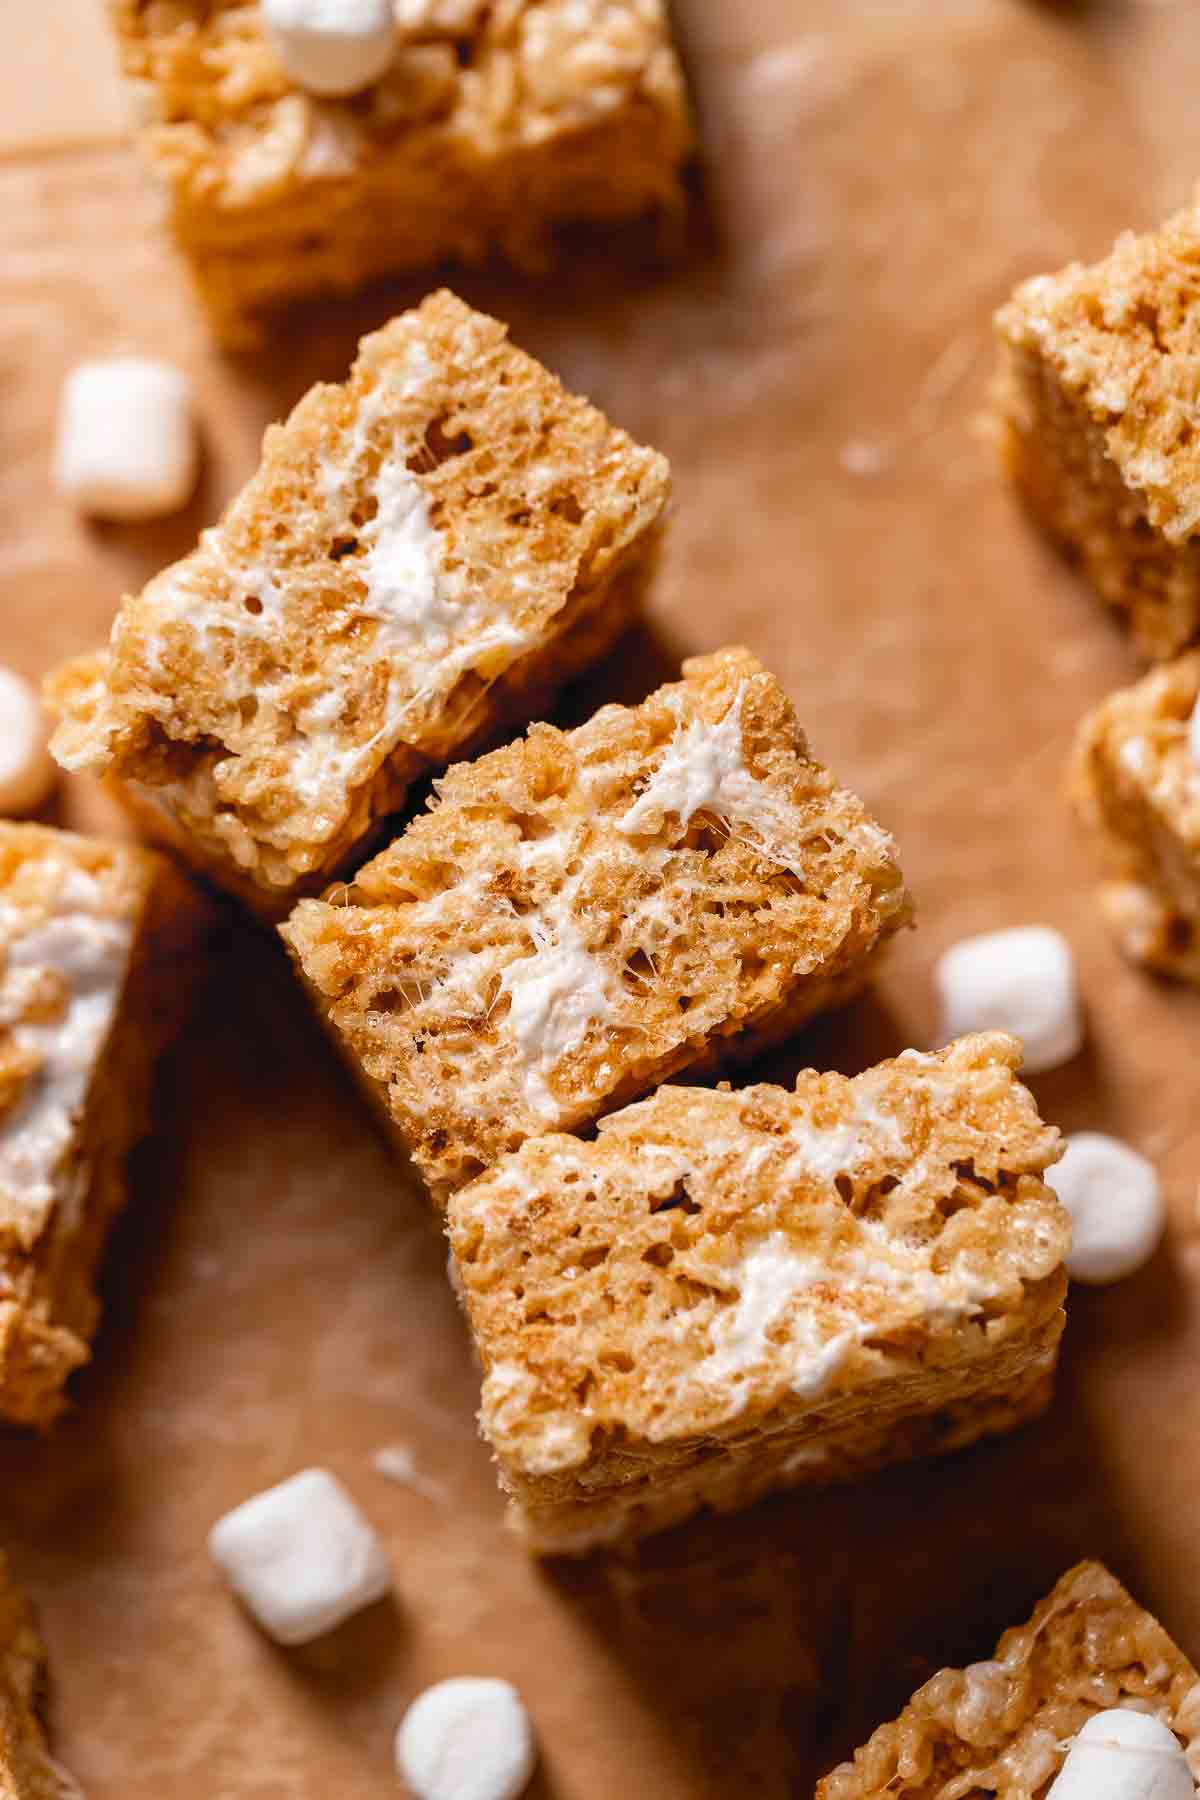
Brown butter rice krispie treats are not the average Kellogg cereal bar you remember. They’re rich, nutty, extra gooey, and way more addictive than they have any business being!
Back in the bakery, I made tons of krispie treats (and just as many loaves of brown butter banana bread), but I knew they could be better. They were sweet yet flavorless, with not nearly enough marshmallows to be gooey. So I fixed them! Rich brown butter for that nutty caramel flavor, real vanilla bean, extra gooey marshmallows, and toasted crispy rice cereal for even more toasty flavor.
Prep time is under 20 minutes. The hardest part is waiting for them to set!
Brown butter makes everything better, especially snickerdoodles! My brown sugar snickerdoodles are soft, chewy, and full of that rich, nutty brown butter flavor that you just don’t get in the classic.
The Baking Process
Find the full list of ingredients, measurements, and instructions in the recipe card below!
1
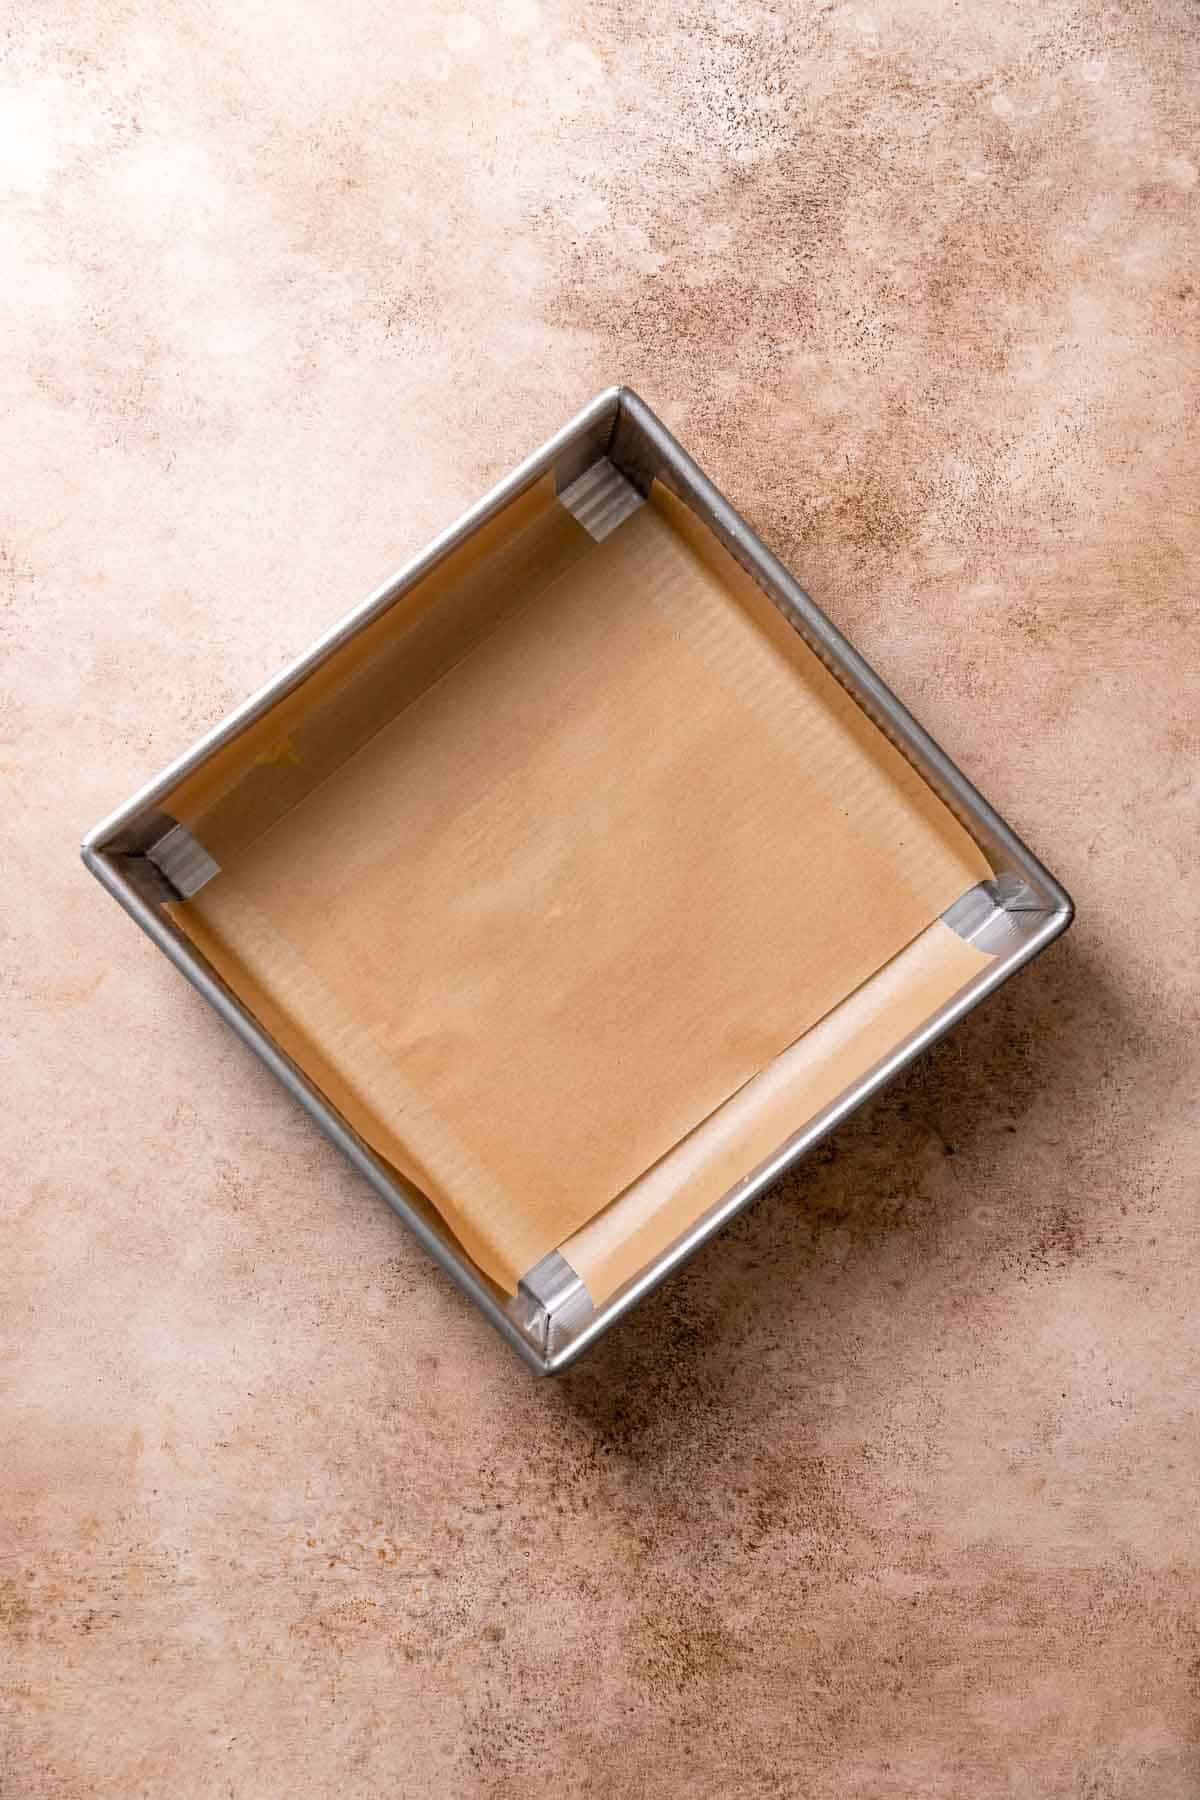
Prepare the pan. Line a 9×9 pan with parchment paper to cover all four sides. Alternatively, generously butter or spray the pan with cooking spray.

2
Toast the crispy rice cereal. You’re looking for an even golden brown color. You can stir the cereal halfway through baking. Make sure you watch it closely…it can go from perfect to burned in seconds!!
Have you tried a brown butter + chocolate combo yet? My brown butter chocolate toffee cookies are always a hit when I bring them to share with friends and family. They’re chewy, buttery, and loaded with crunchy toffee bits and brown butter!
3
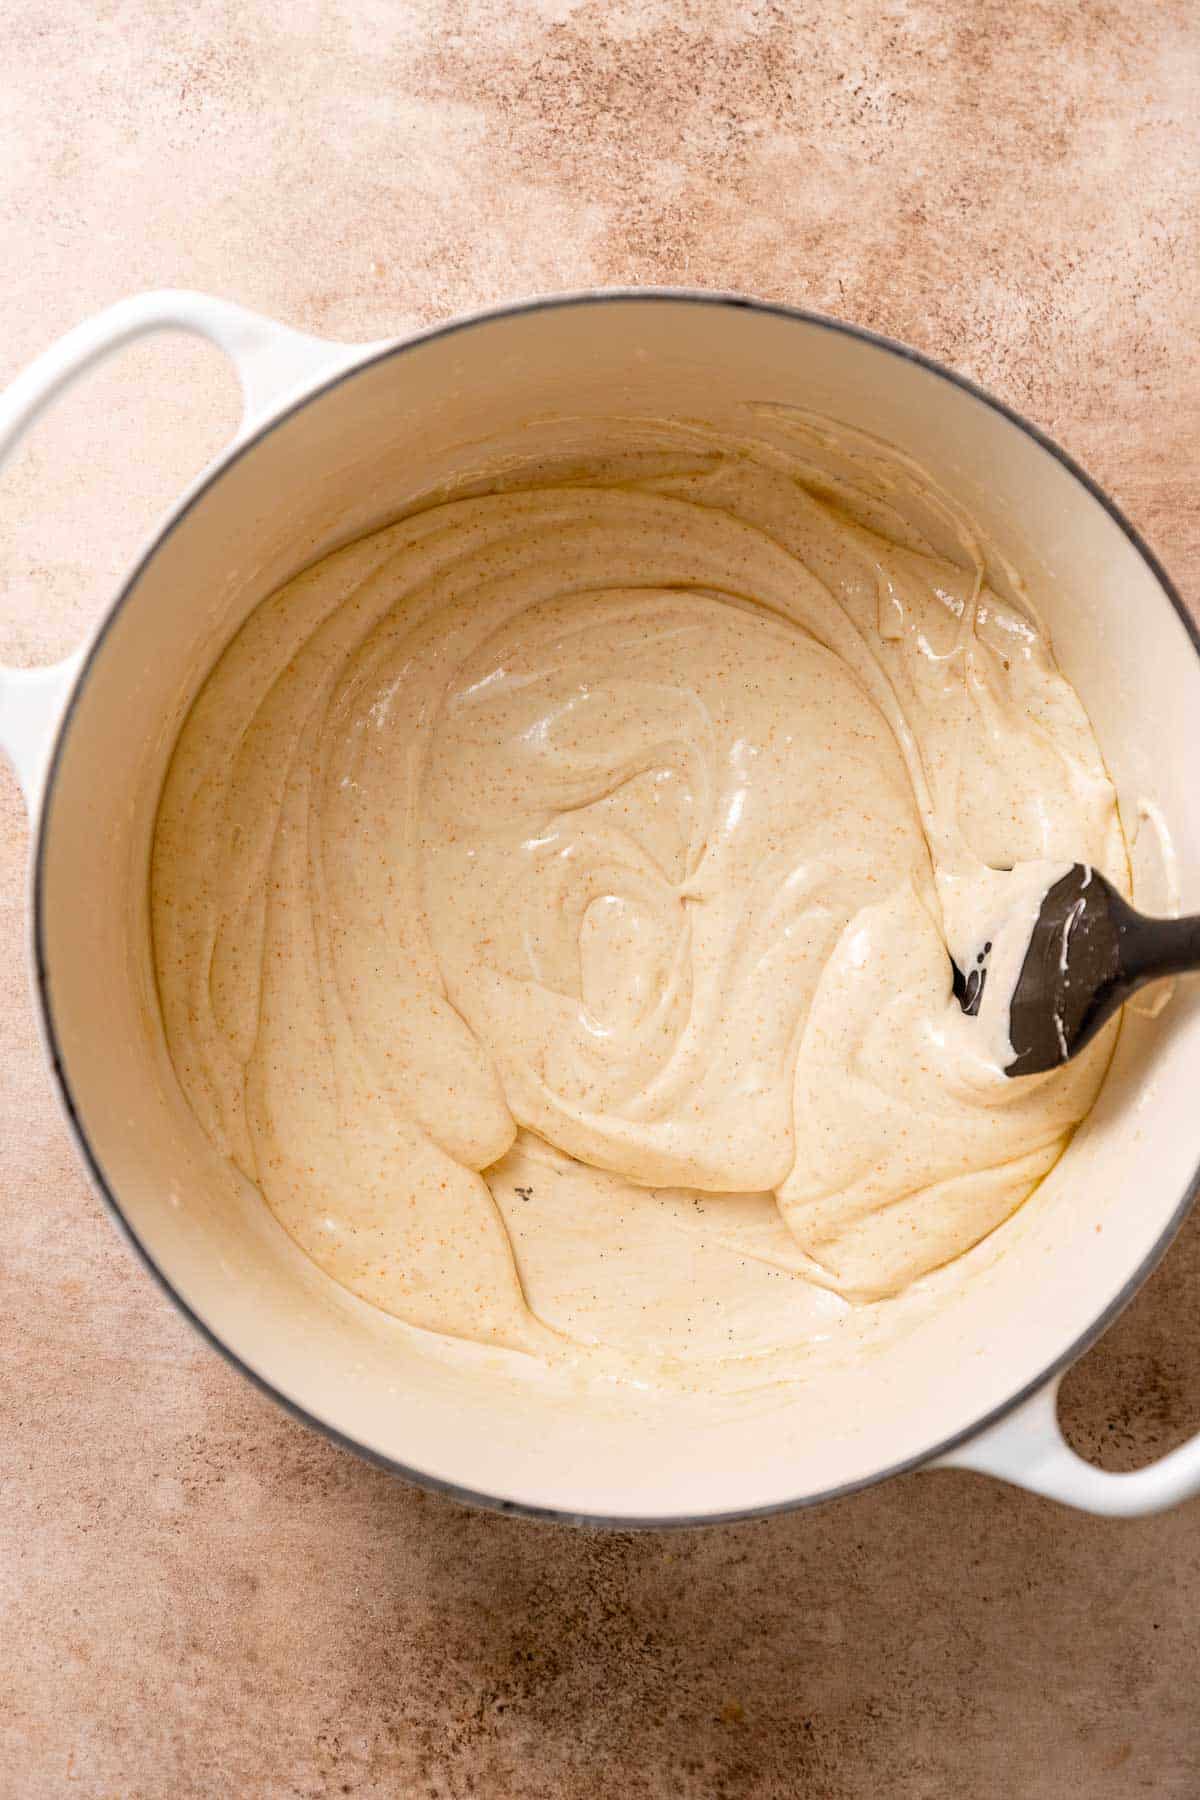
Make the brown butter, add the mini marshmallows and vanilla bean paste, and melt over gentle heat. I recommend using European butter for a super-rich buttery flavor like my brown butter cinnamon rolls.
4
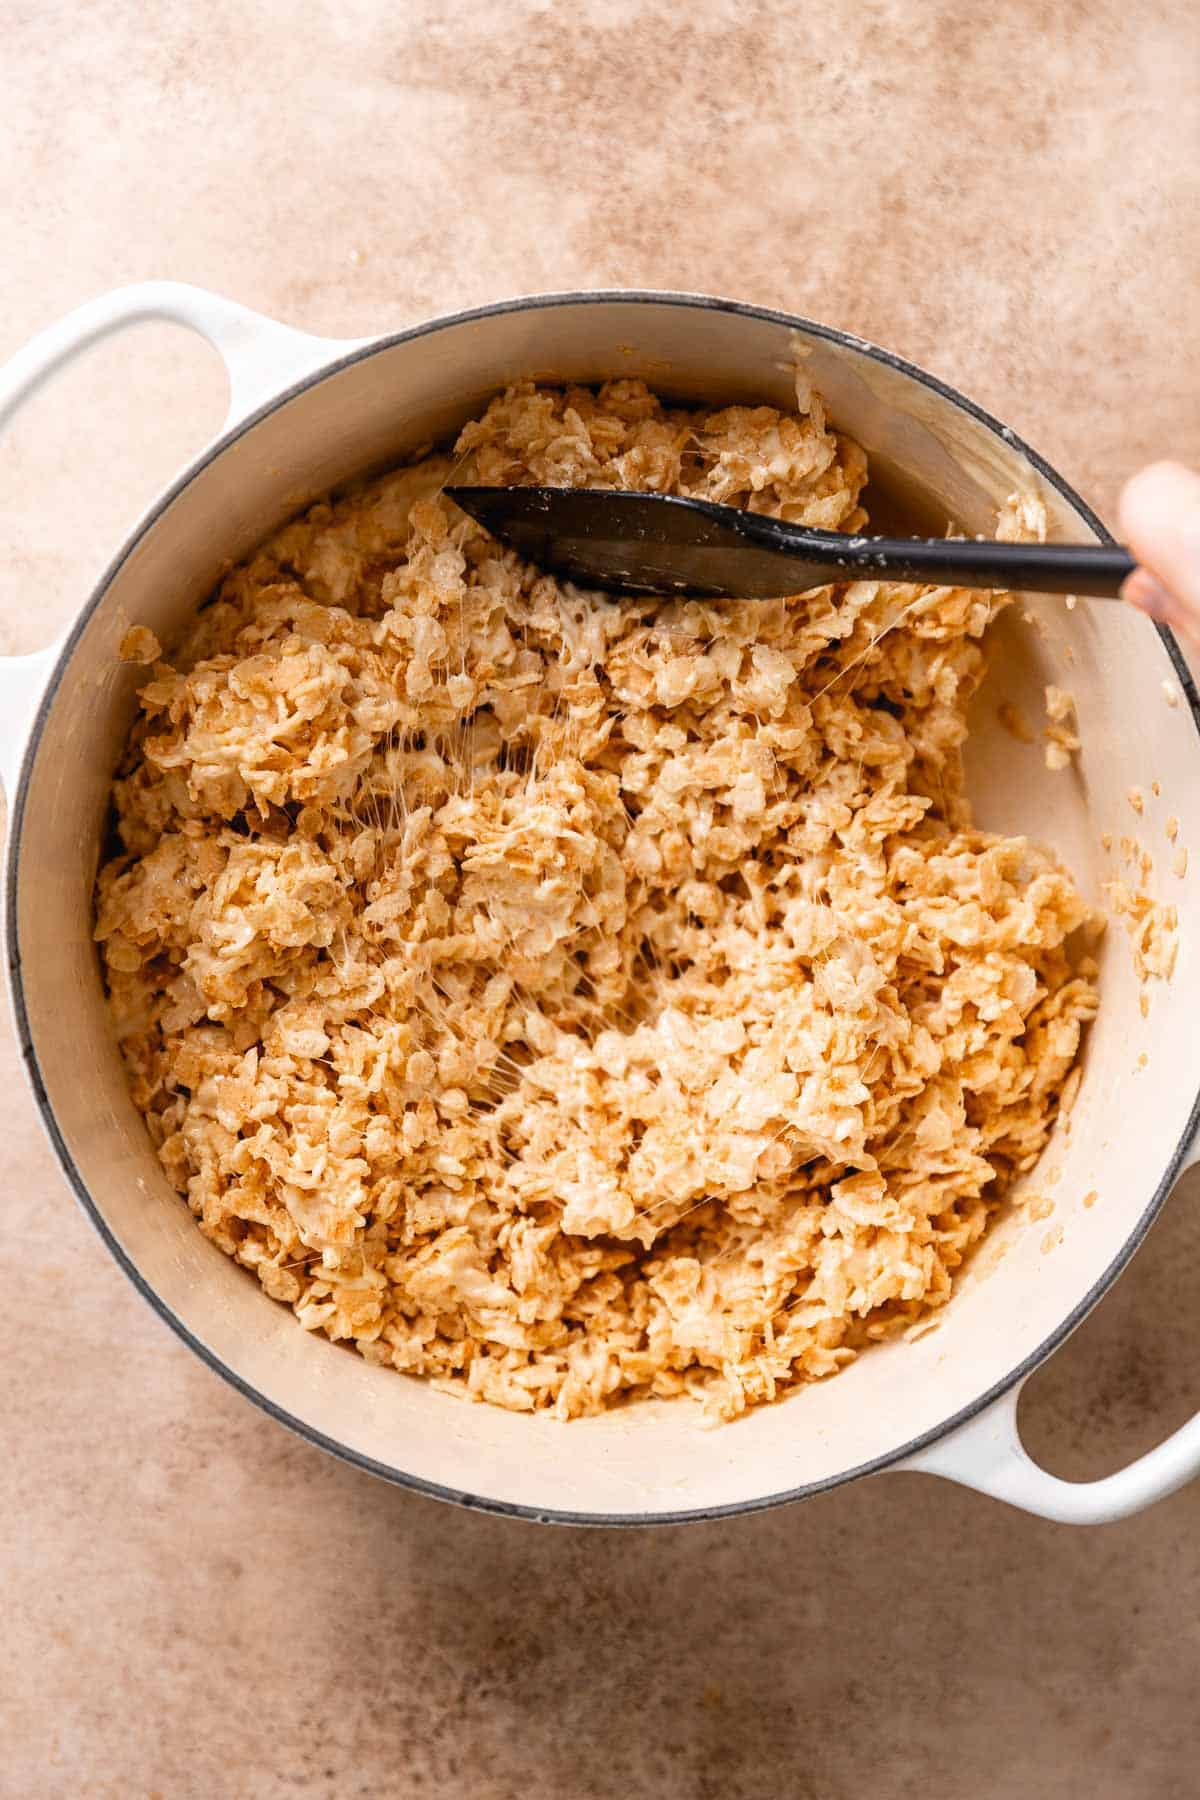
Mix in the toasted cereal. Once you add the cereal, the mixture will become more difficult to stir, so you’ll want to move quickly!
5
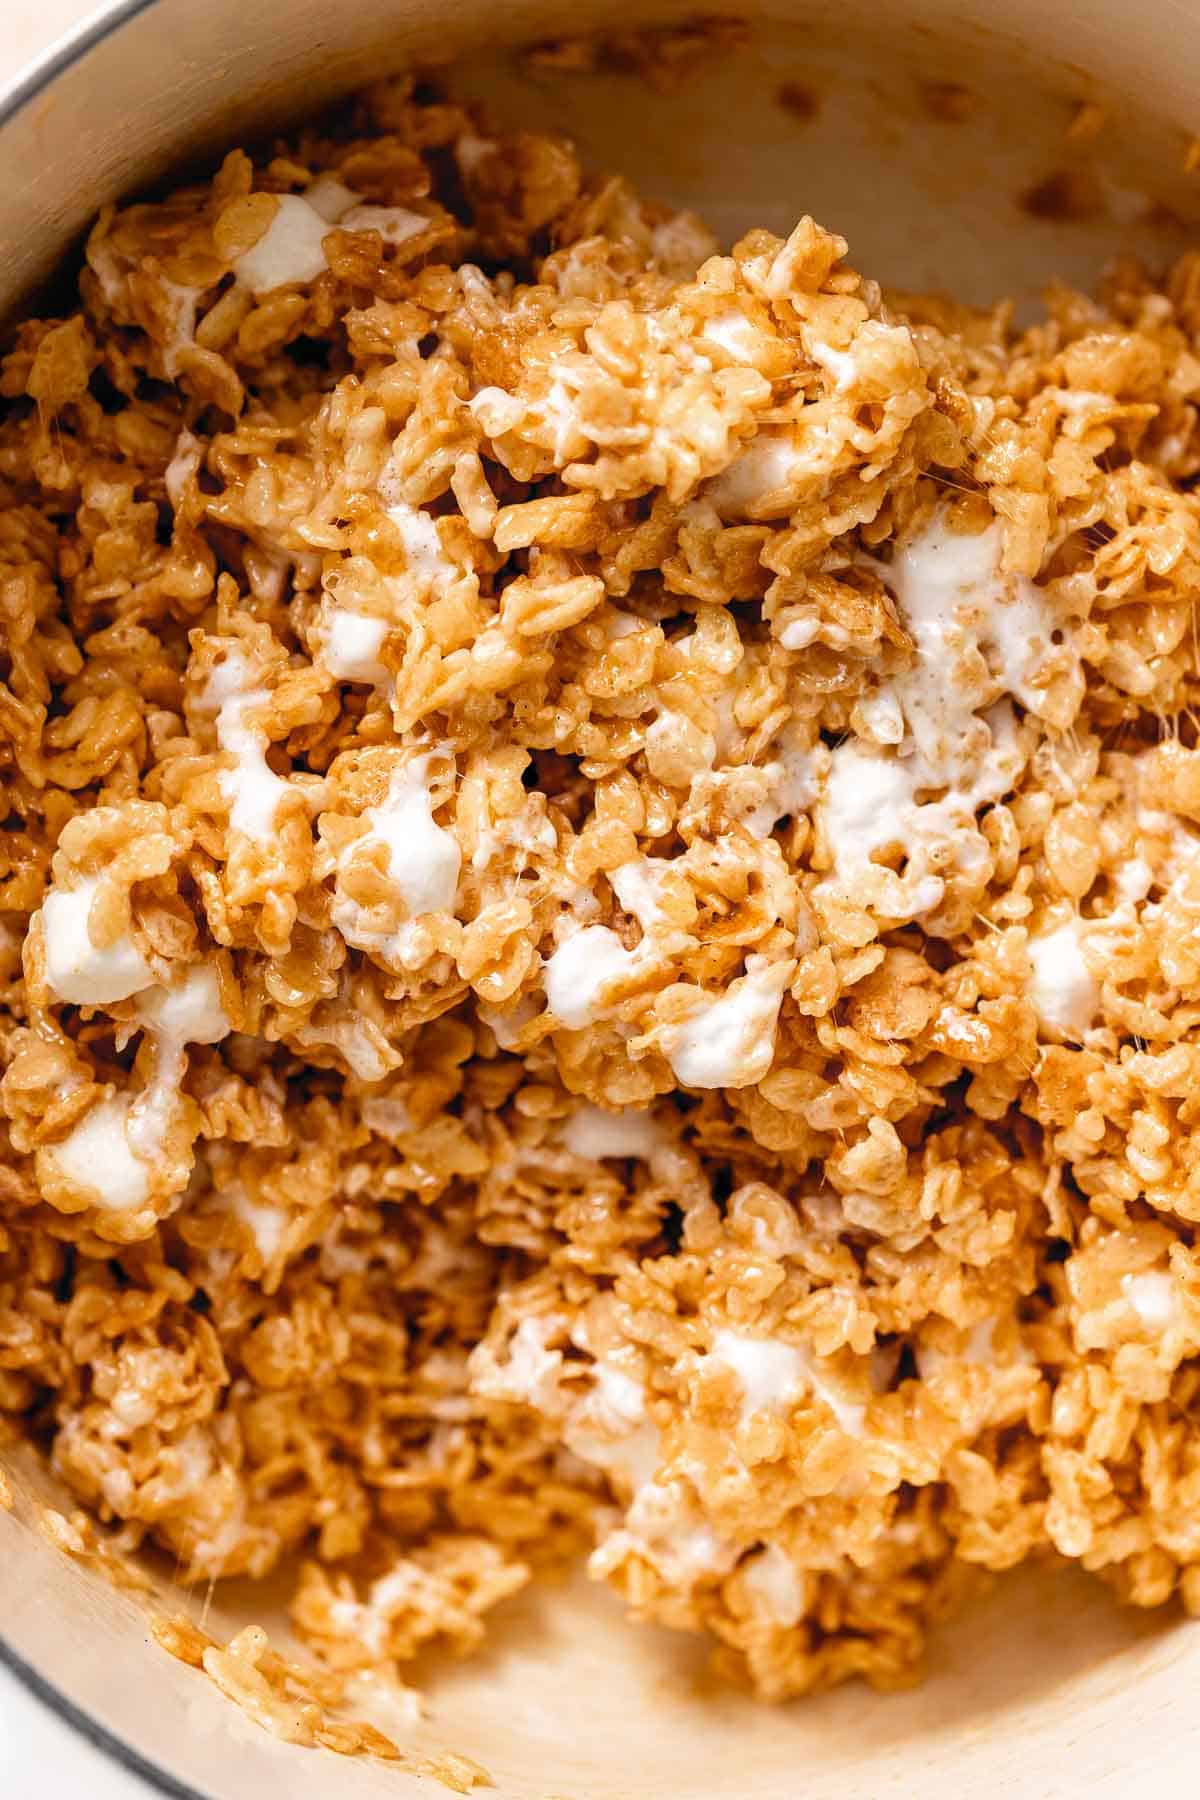
Fold in the extra marshmallows until they are half melted. This is key to gooey pockets of marshmallow!

6
Gently press the rice krispie mixture into a pan using butter wrappers. A gentle hand will give you a soft, chewy texture that melts in your mouth! Packing it firmly into the pan will produce a firmer texture, similar to the store-bought version.
Love brown butter as much as I do? Then you’ve got to try my brown butter chocolate chip blondies. They’re soft, thick, and every bite is packed with melty chocolate and that rich, nutty brown butter flavor we’re all obsessed with.
If you tried this or any other recipe on my website, please let me know how it went in the comments; I love hearing from you! Also, please leave a star rating while you’re there! You can also tag me on Instagram or Facebook so I can check it out!

Gooey Brown Butter Rice Krispie Treats (Bakery-Style!)
Equipment
- 9×9 pan *See notes for other pan sizes*
Ingredients
- 7 cups mini marshmallows, divided
- 6 cups crispy rice cereal
- 14 tablespoons unsalted European butter
- 1 teaspoon vanilla bean paste, substitute vanilla extract
- 1/2 teaspoon fine sea salt
Instructions
- Prepare the baking pan. Line a 9×9 pan with parchment paper to cover all four sides, or generously butter or spray with nonstick spray.
- Divide the marshmallows. Set aside 1 1/2 cups of the mini marshmallows for folding in at the end.7 cups (13 oz) mini marshmallows
- Toast the crispy rice cereal. Spread the crispy rice cereal onto an unlined baking sheet and toast under the broiler, stirring every minute, until golden brown. Watch it VERY carefully so that it doesn’t burn! The top will turn golden brown quickly, then after stirring, it will only take another minute for it to brown again. Keep repeating this process until all of the cereal is browned.6 cups (6 oz) crispy rice cereal
- Make the brown butter. In a large Dutch oven or pot, cook the butter over medium heat, stirring occasionally, while it sizzles, foams, bubbles, and pops. Stand nearby and watch it so that it doesn't burn. Once the milk solids at the bottom of the pan are amber-brown, turn the heat off. Pro tip- save the butter wrappers to use later!!14 tablespoons (196 grams) unsalted European butter
- Melt the marshmallows. Add the 5 1/2 cups of mini marshmallows, salt, and vanilla bean paste and stir until the marshmallows are completely melted and combined with the brown butter.1 teaspoon vanilla bean paste, 1/2 teaspoon fine sea salt
- Mix in the toasted cereal. Take the pan off the heat and mix the cereal into the marshmallow mixture.
- Fold in extra marshmallows. Once combined, fold in the reserved 1 1/2 cup mini marshmallows until they are starting to melt but not completely melted. This is key to gooey pockets of marshmallows!
- Press the rice krispie mixture into a pan. Use a reserved butter wrapper to gently press the rice krispy mixture into the pan. For a firm texture similar to store-bought rice crispy treats, compact it into the pan. For a soft and gooey texture, don’t compact it!
- Let set before cutting. Let the krispie treats firm at room temperature for at least 30 minutes, then use a sharp knife to cut them into big or little squares. Enjoy!


This is just the very best rice krispie treats out there! I have made a TRIPLE BATCH of these every Independence Day since the recipe came out. They are *always* requested. And the entire pan gets eaten with extras being taken home by adoring fans! Don’t cheap out and buy off brand krispies — they don’t toast the same. I’ve found they burn far more easily! And make sure you use super fresh marshmallows too. That makes a world if difference. You will NOT be disappointed should you choose to make these! Worth the extra time and effort. The web site won’t allow me to rate it 5 stars! BUT I RATE IT 5 STARS–NOT 4!