New to baking with yeast? This complete guide is packed with everything you need to know. Download my PDF version and keep it with you when you bake!
As a former pastry chef, learning how to bake with yeast was one of the first skills I mastered. It’s important to understand how yeast works so that you can bake with confidence!
In this guide, I’m sharing everything you need to know about what yeast is, how to use it, and even some of my favorite easy recipes, like chewy pizza dough and garlic rolls!
Table of Contents
What is Yeast?
Yeast is a living organism that eats sugars and releases carbon dioxide gas. This gas gets trapped inside bread dough, causing it to expand and rise in the oven.
Yeast also produces alcohol (and other flavor compounds) through fermentation that flavors the dough and gives your baked good that classic yeast flavor.
Think of it like baking powder or baking soda- it’s ultimately a leavening agent!
Different Kinds of Yeast
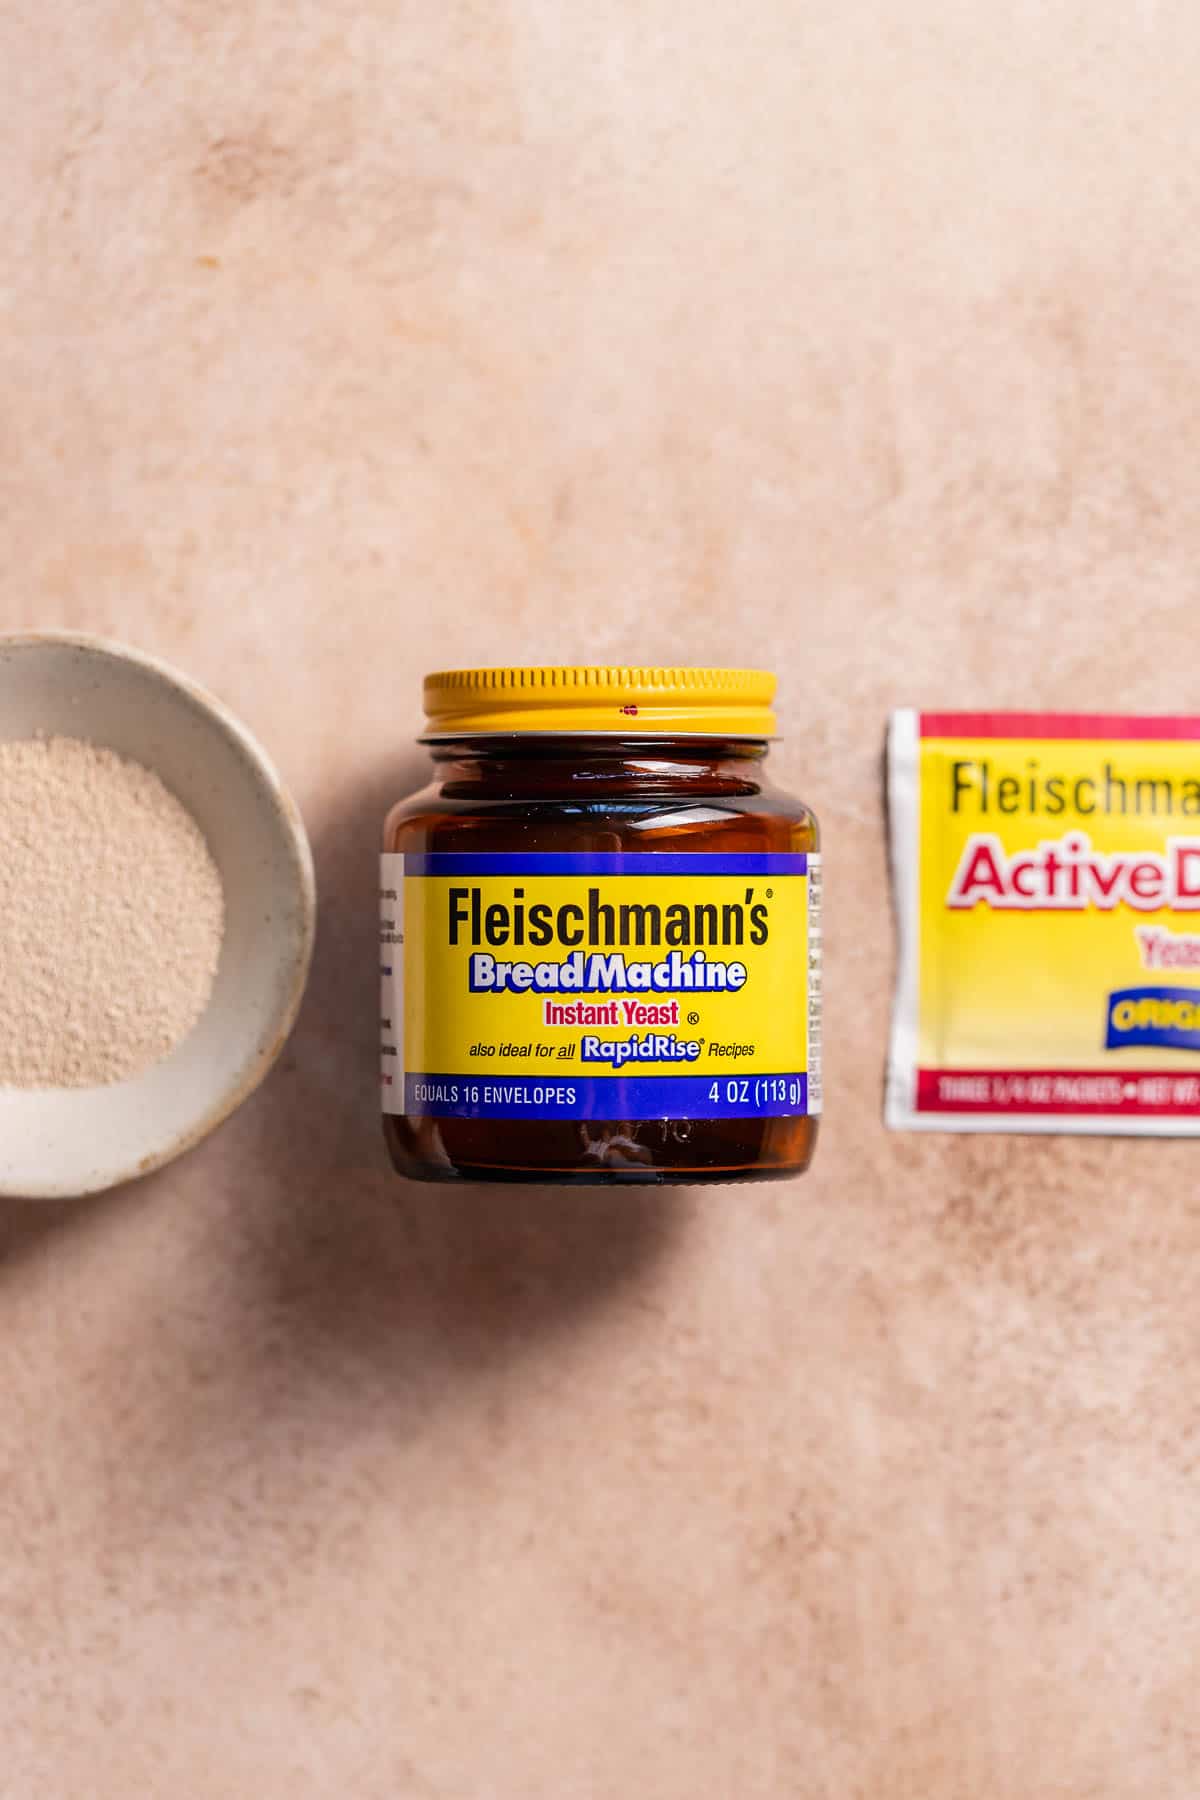
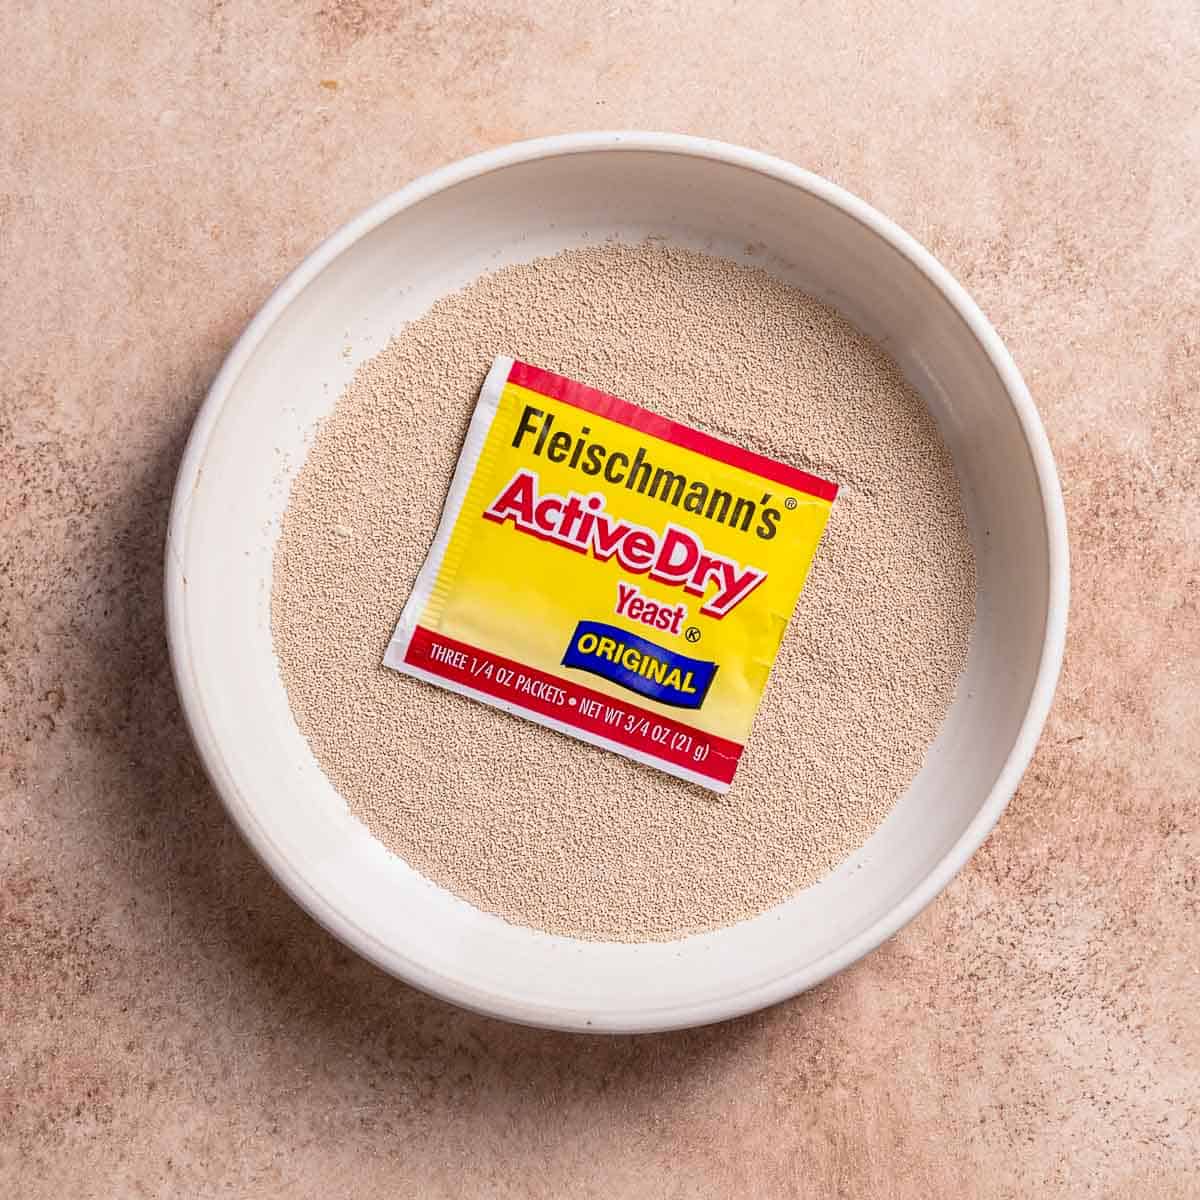
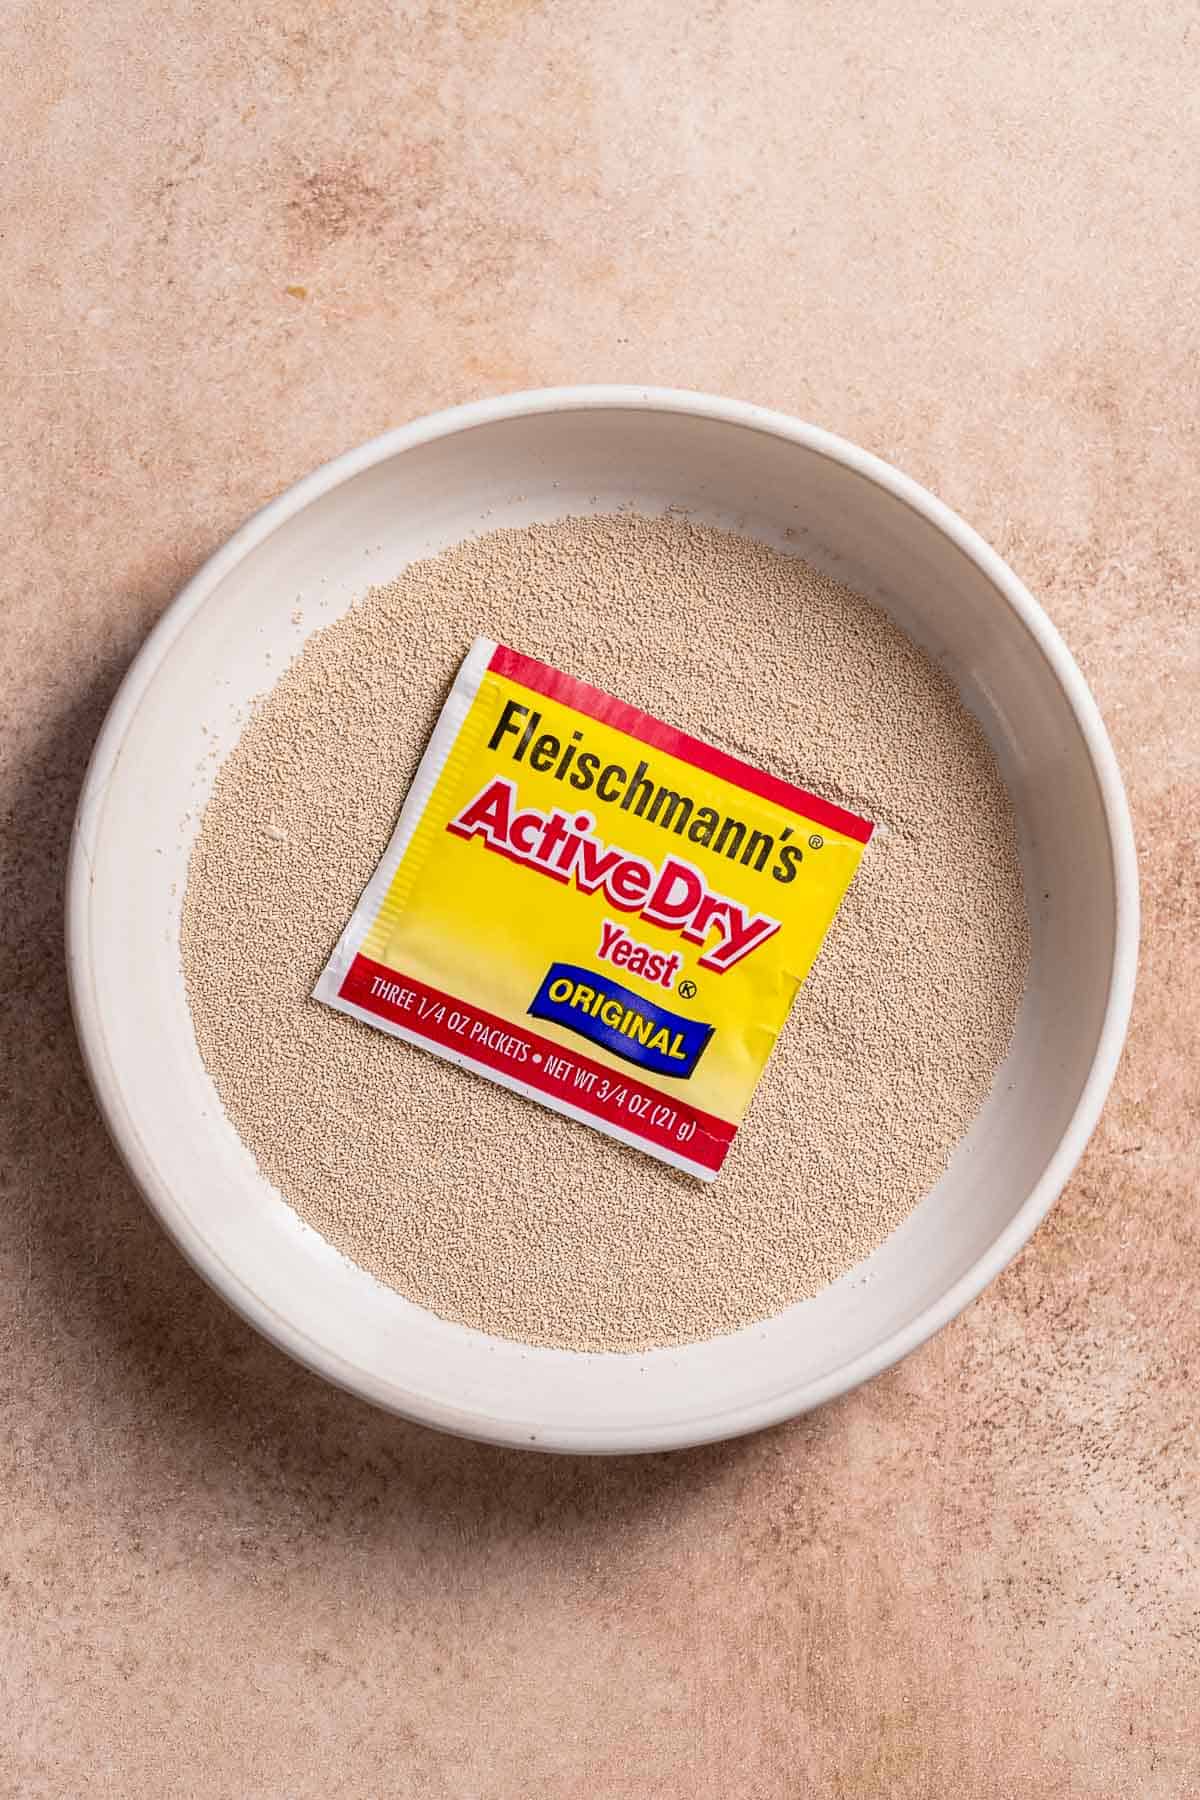
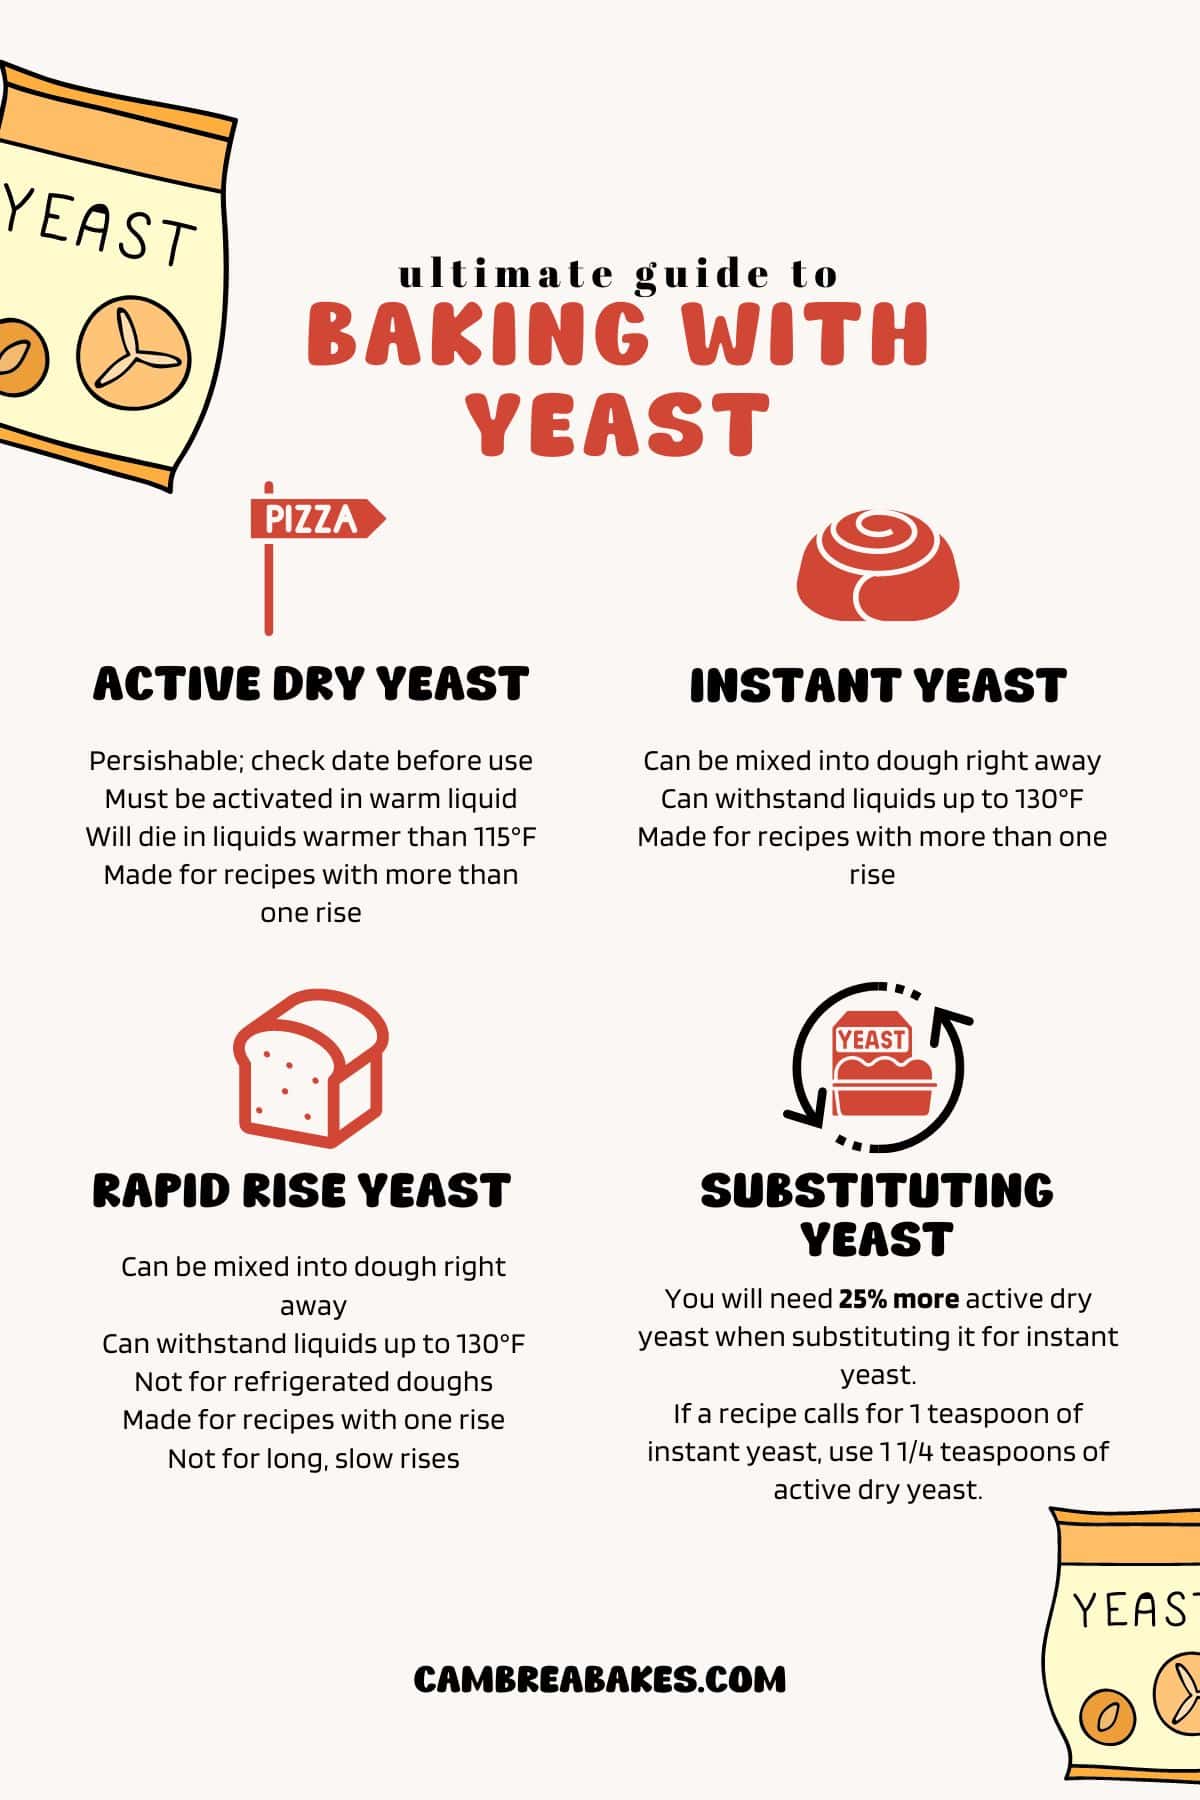
Active dry yeast: Requires “activation” in warm water and sugar before use. It adds a subtle yeasty flavor to baked goods.
Instant yeast: A convenient, fast-acting yeast that requires no activation and needs a short rise time. It produces a more noticeable flavor than active dry. I love using it in my homemade cinnamon rolls!
Rapid rise yeast: Similar to instant, this fast-acting yeast requires no activation and is best for recipes with one rise.
Fresh yeast (AKA cake yeast): You generally won’t find this as it isn’t sold in most stores. It’s mainly used in bakeries!
How to Substitute It
You can substitute active dry for instant and vice versa by making these adjustments:
- Activating it: Active dry yeast must be activated in warm water with a pinch of sugar. Stir and let it sit for 5-10 minutes until it looks foamy and bubbly.
- Adjusting the quantity: You will need roughly 25% more active dry yeast when substituting it for instant yeast. For example, if a recipe calls for 1 teaspoon of instant, use 1 1/4 teaspoons of active dry.
- Increase the proof time: Active dry yeast will need a first and second rise because it takes longer to ferment.
Importance of Kneading the Dough
Gluten development: Kneading forms gluten strands, creating an elastic structure that traps the carbon dioxide (commonly referred to as a gluten windowpane). This trapped gas raises the dough and yields light, airy baked goods, like my stuffed pretzels!
Yeast distribution: Kneading ensures that the yeast is evenly distributed throughout the dough. This even distribution allows for consistent fermentation that ensures all parts of the dough rise evenly.
Rising time: When the dough is well kneaded, the gases are trapped properly, and bread dough requires less rising time!
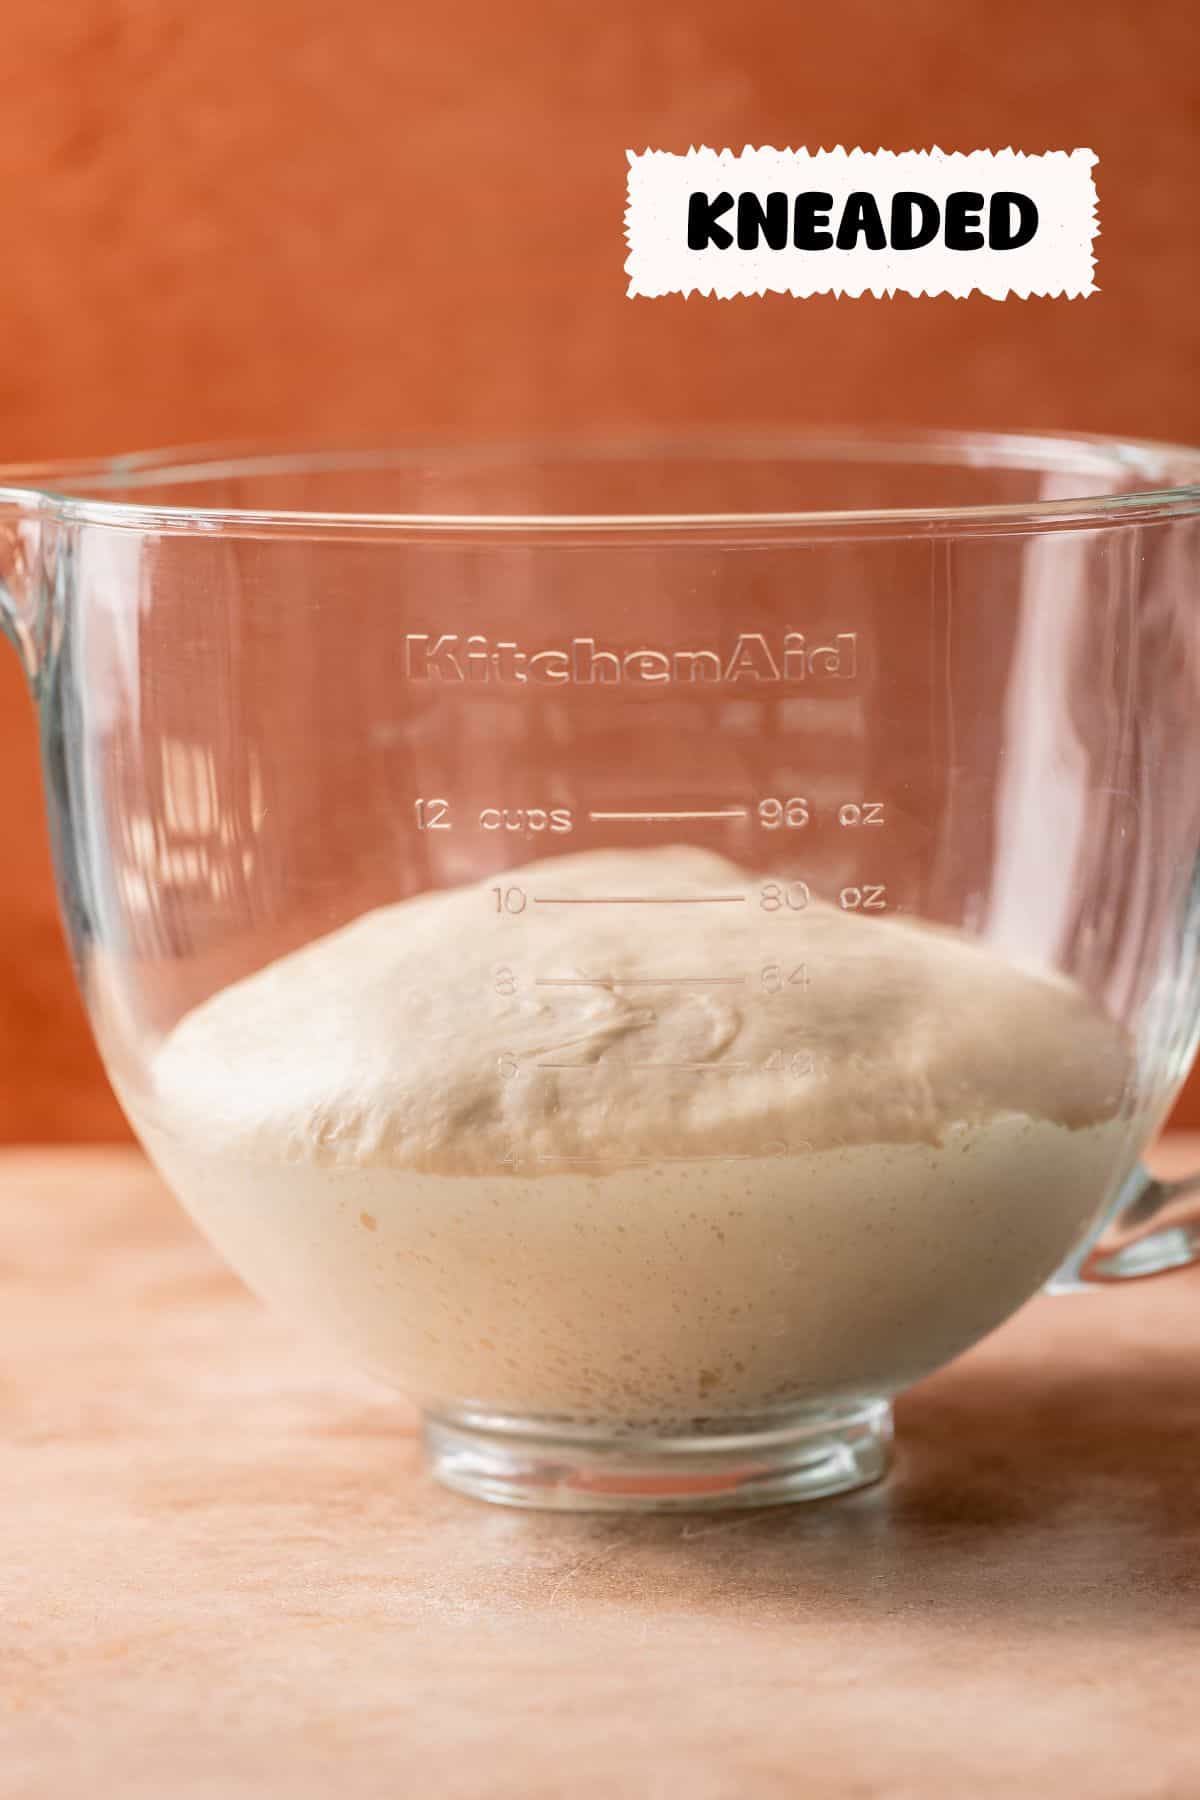
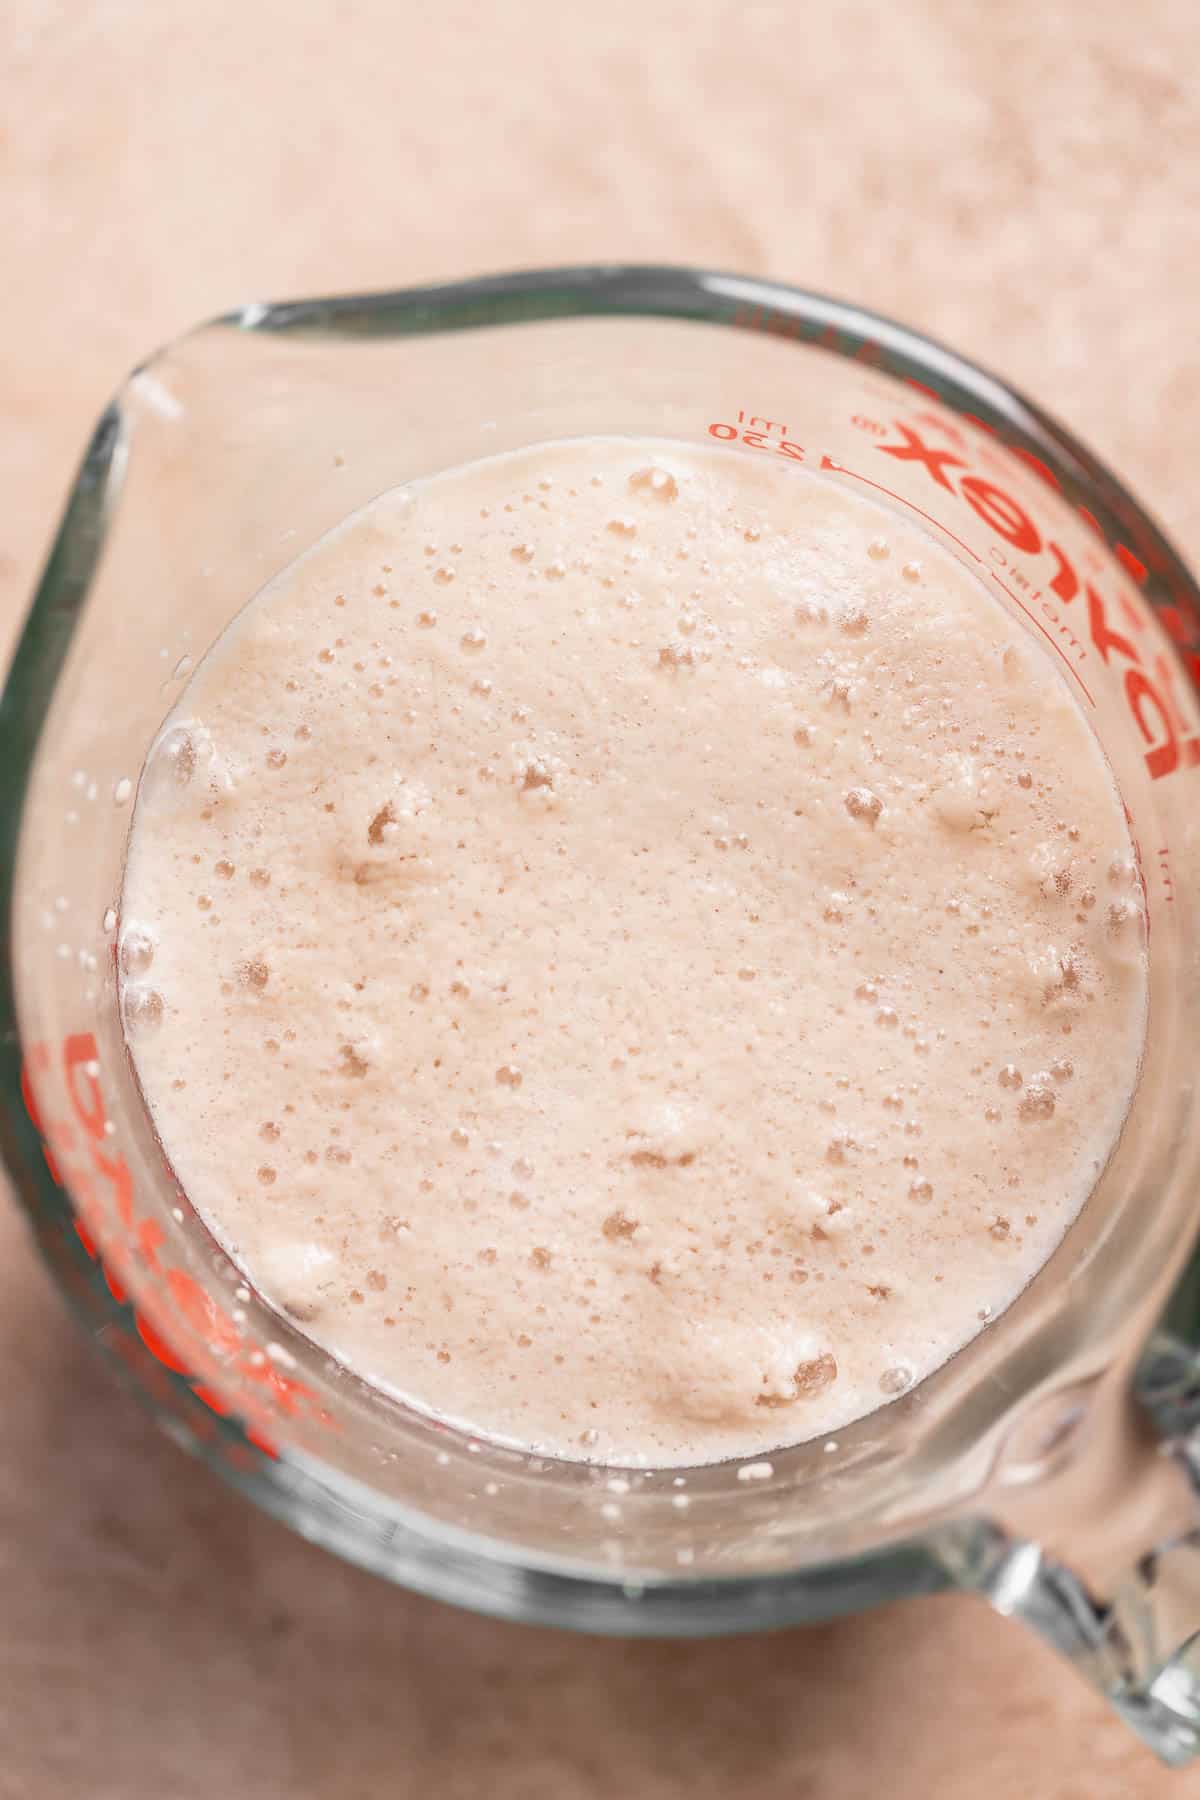
Kneaded dough: My pizza dough recipe was well-kneaded for 10 minutes. After 1 hour, you can see it has doubled in size and looks light and airy.
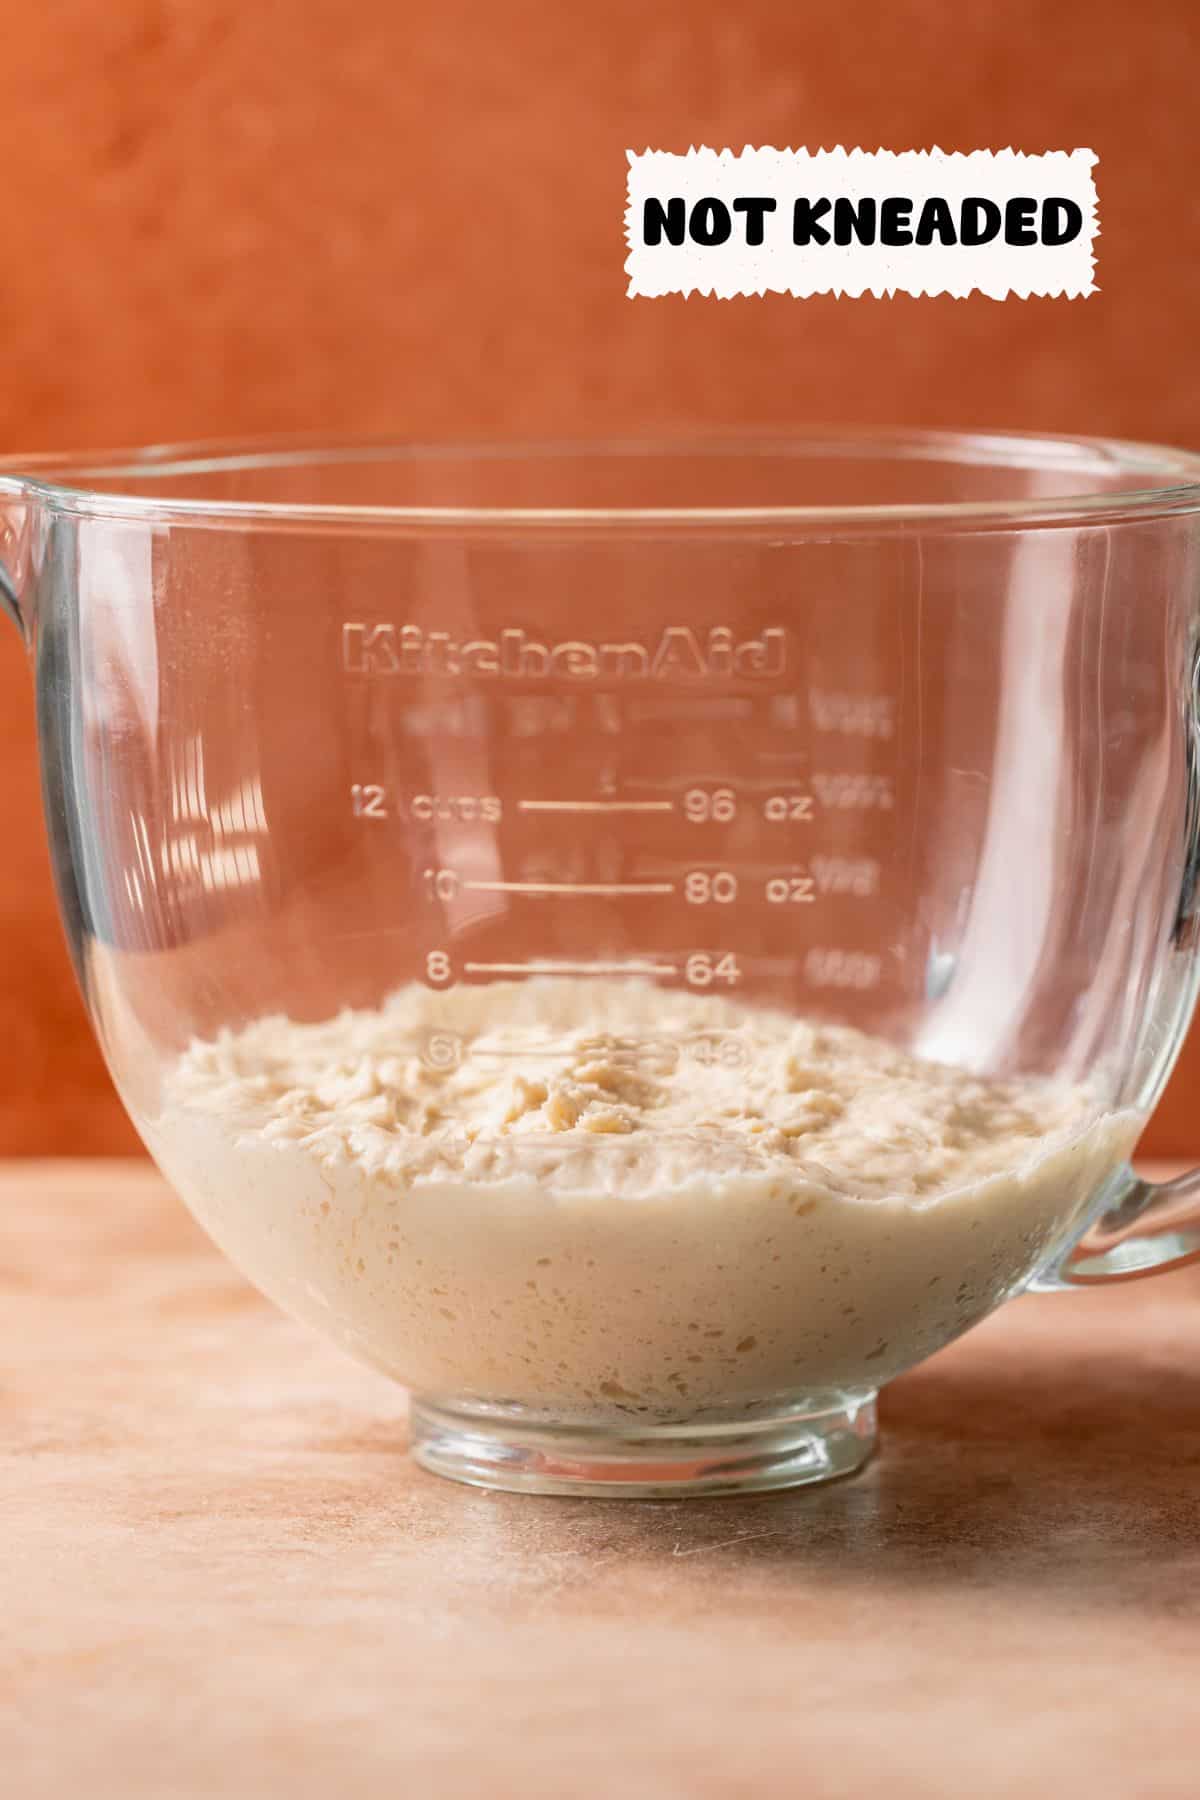
Not kneaded dough: This batch was only mixed until incorporation. You can see after 1 hour, it barely rose because it did not have the proper structure to trap the gases.
Importance of Proofing
When working with yeast, proofing the dough is very important. You can see below the differences in texture of the final product of my garlic bread rolls.
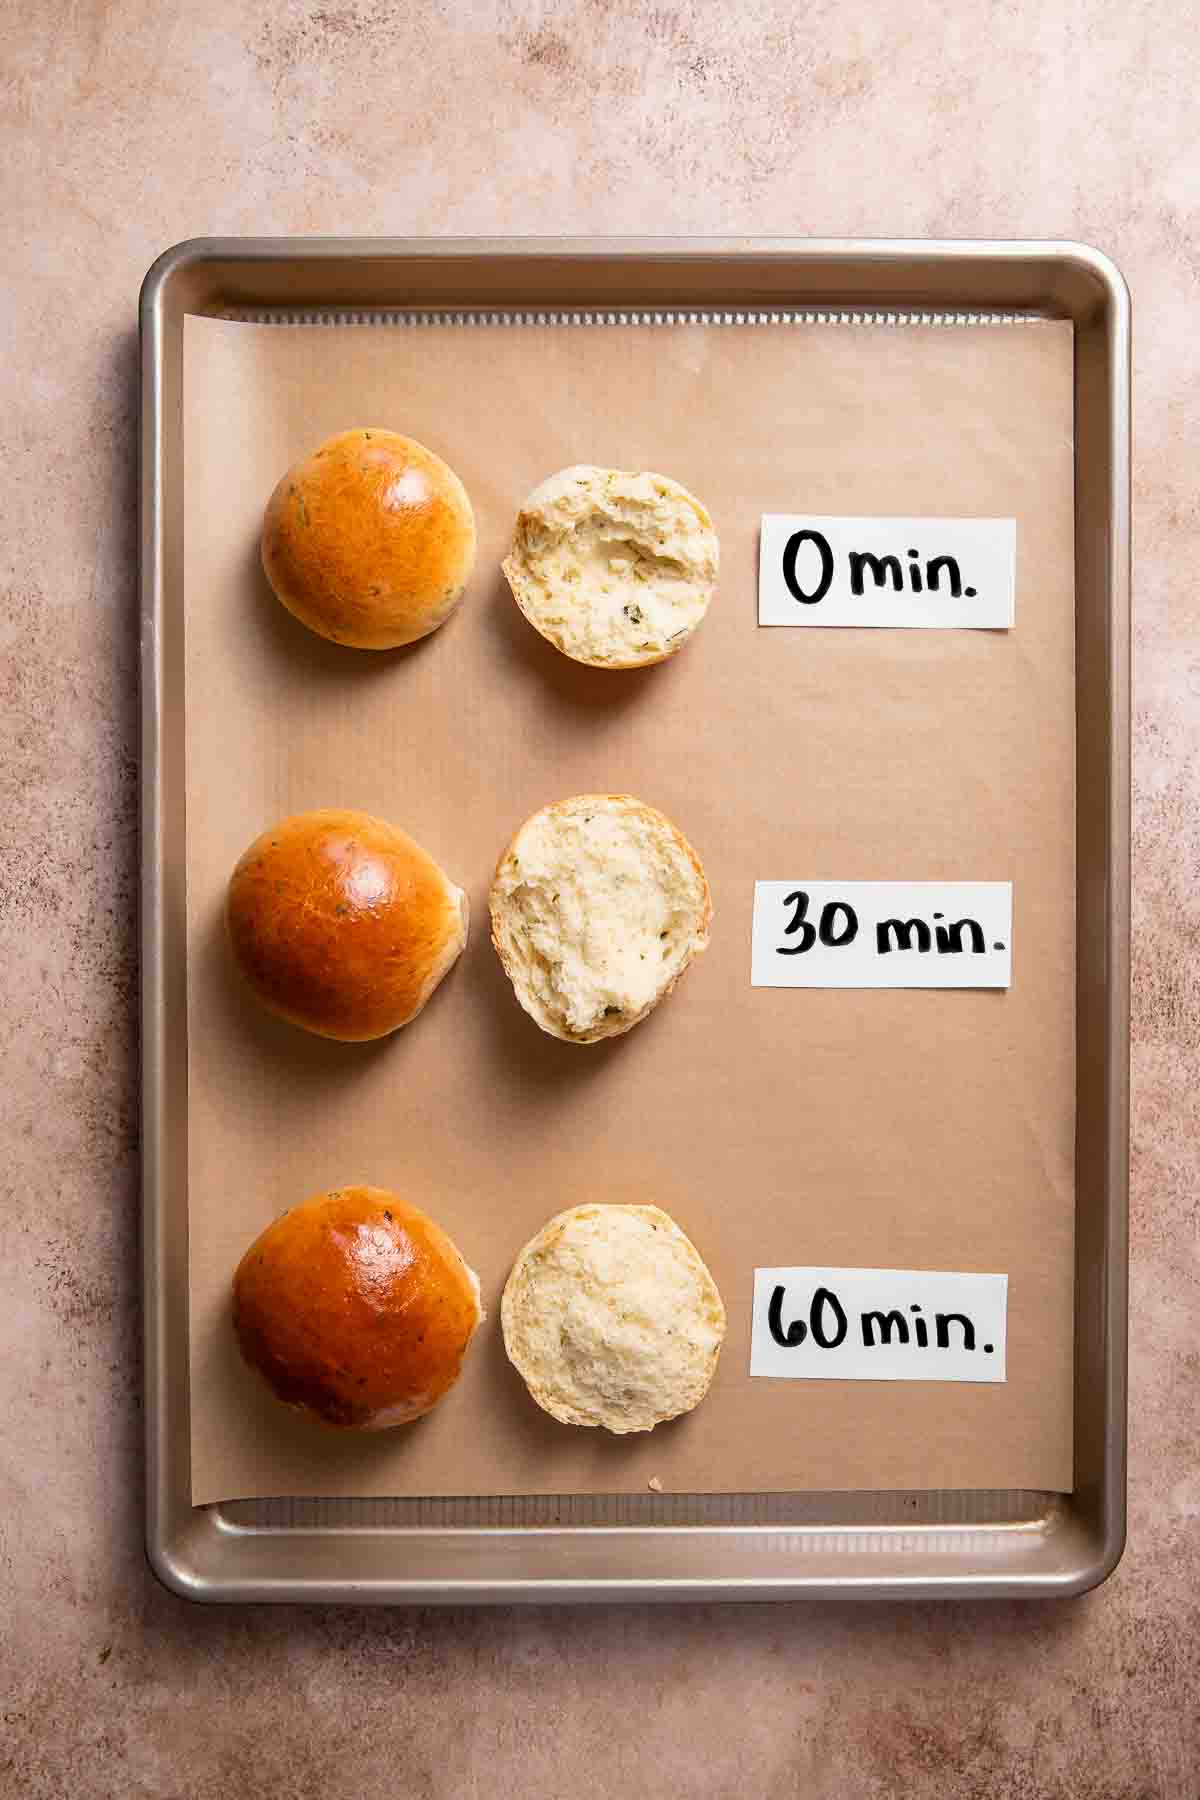
After 0 minutes, the rolls were baked right after forming. They were very dense, tough, and heavy.
After 30 minutes, the rolls were fluffier than the first batch but still slightly dense and heavy.
After 60 minutes, the dough doubled in size, resulting in very light and fluffy rolls!
Note about over-proofing: Over-proofing occurs when yeast eats all of the sugars in the dough and can no longer produce carbon dioxide. This results in a poor rise that collapses after baking and can result in a sour taste.
4-Step Baking Process
Here is my 4-step guide to use when baking. You’ll recognize this same process when making any of my recipes, like my onion focaccia, cast iron pizza, or coffee cinnamon rolls!
- Shape the dough. Forming a tight dough ball creates surface tension, trapping the gases yeast produces.
- Let it rise. Yeast will initially be in a dormant state. The rising time lets it feed on the sugars in the dough to produce carbon dioxide.
- Cover the bowl. Cover the bowl with plastic wrap or a clean kitchen towel. This creates a warm, humid environment to promote activity.
- Check for doneness. Press a finger into the dough—it should leave a slight indentation that slowly springs back. The dough should appear puffy and visibly larger.
What NOT To Do With Yeast
Don’t use expired yeast: Always check the expiration date on the package before using it. Expired yeast can lead to poor rising or not rising at all!
Don’t use water that is too hot or too cold. Aim for liquids to be between 105°F to 110°F (40°C to 43°C)—too cold won’t activate it, while too hot will kill it!
Avoid adding salt directly to yeast. Salt can prevent activity with direct contact. Add salt to the flour and mix it in before incorporating the yeast.
Don’t under-knead. This can result in a weak gluten structure, which prevents the dough from trapping the gases.
Don’t rush the process! Allow the dough to rise for the recommended time specified in the recipe. Rushing it can result in underdeveloped flavor and texture.
Favorite Yeast Brands
These brands I used professionally in bakeries but also use at home!
Storing for Freshness
- Cool and dry environment: Store it in a cool, dry place away from direct sunlight, moisture, and heat sources. Your pantry is perfect!
- Airtight container: Transfer any opened packages to an airtight container to prevent exposure to air and moisture. I love buying the jars because you can seal them airtight!
- Refrigeration: Consider storing it in the refrigerator or freezer for long-term storage.
Download the PDF Guide
Download this easy-to-reference PDF guide, which you can print out!
Favorite Yeast Recipes
If you found this guide helpful, please let me know in the comments below. I love hearing from you! You can also tag me on Instagram or Facebook if you make a delicious yeast recipe so I can check it out!