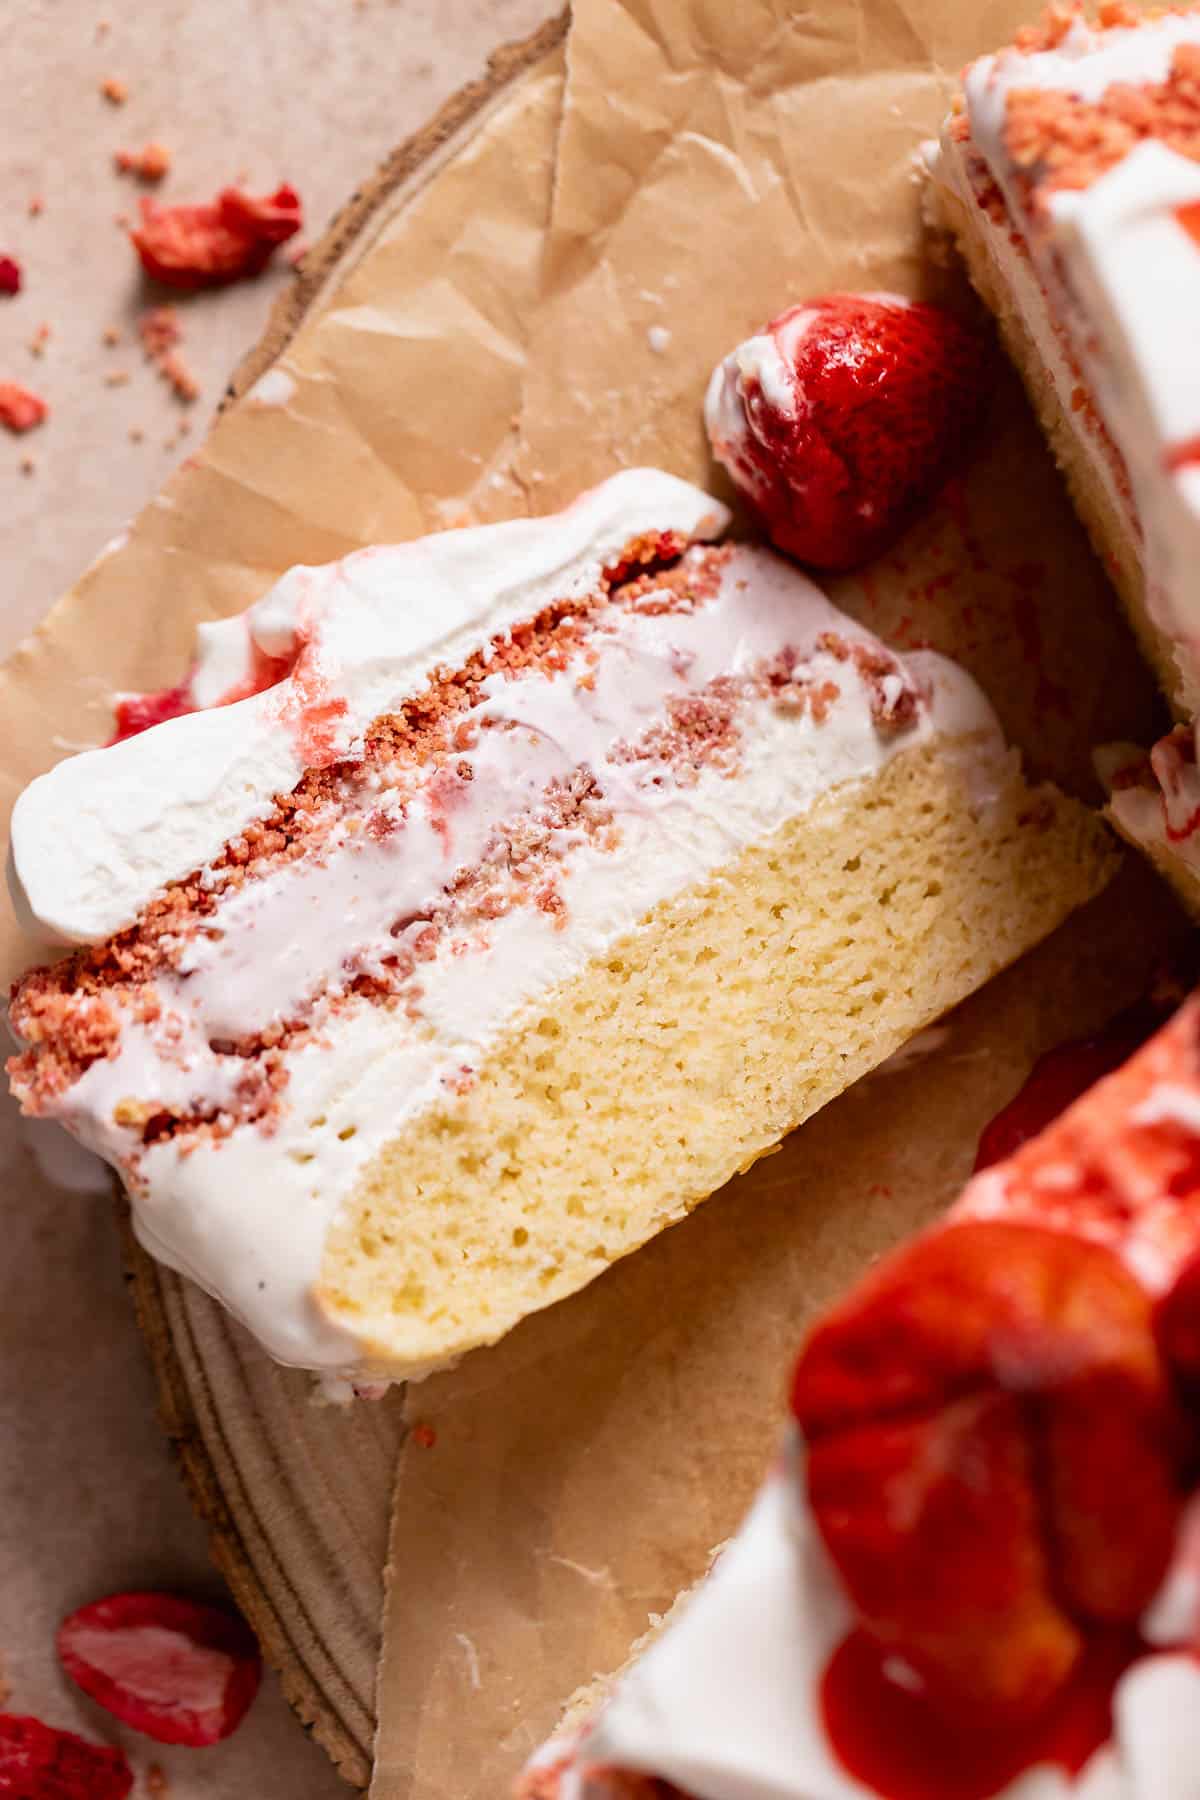
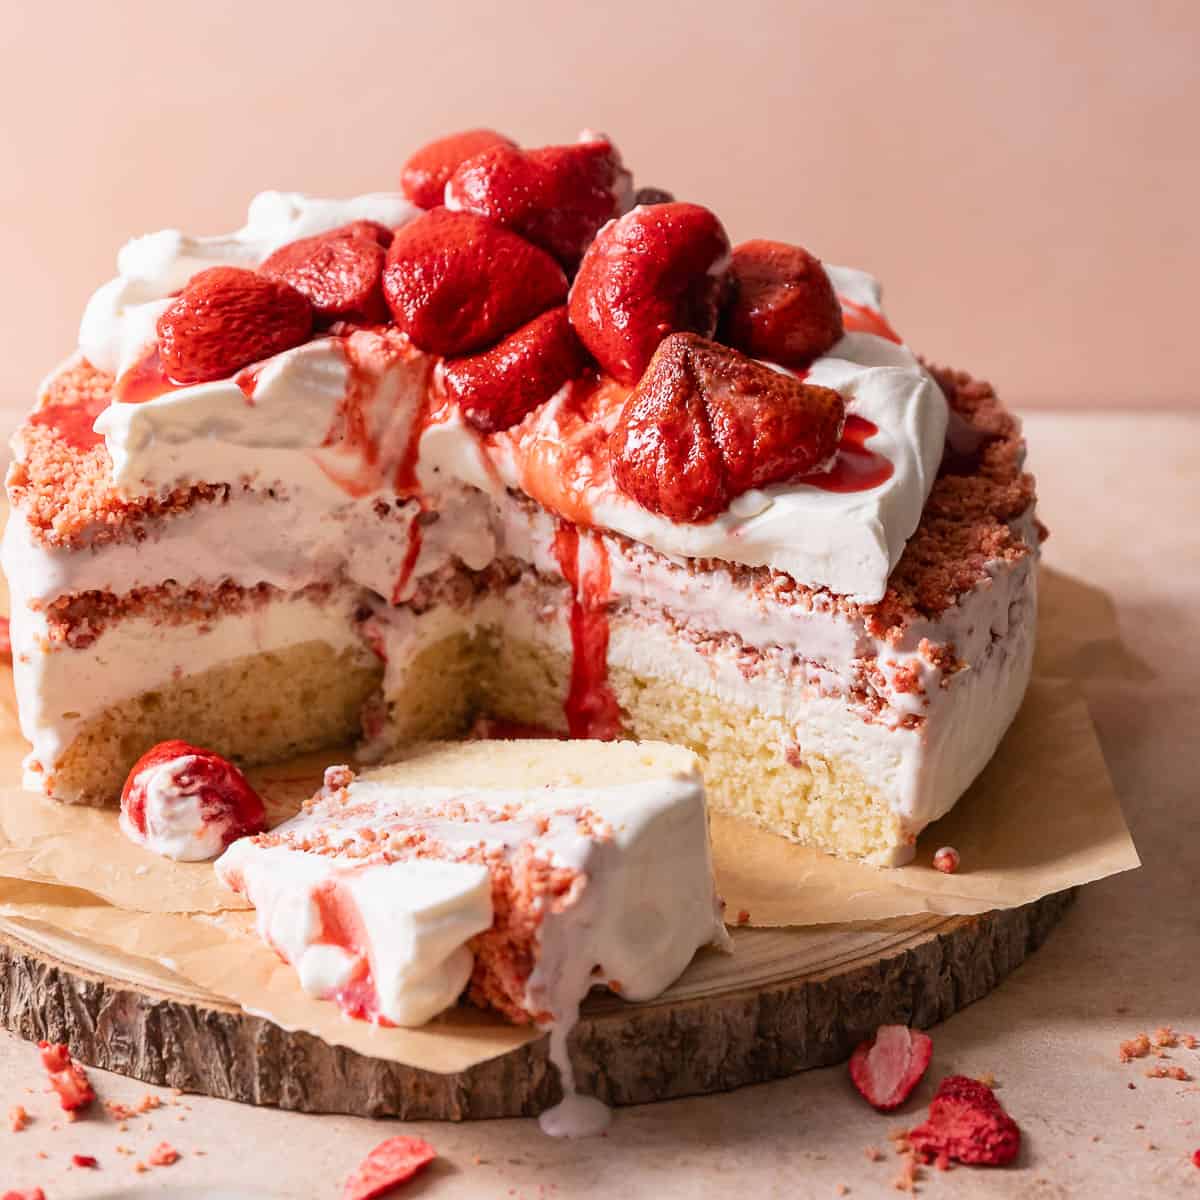
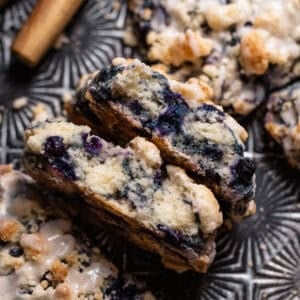
Strawberry shortcake ice cream cake is the ultimate warm-weather dessert. It’s layered with strawberry shortcake crumble, vanilla ice cream, strawberry ice cream, and a soft, straight-from-the-freezer vanilla cake!
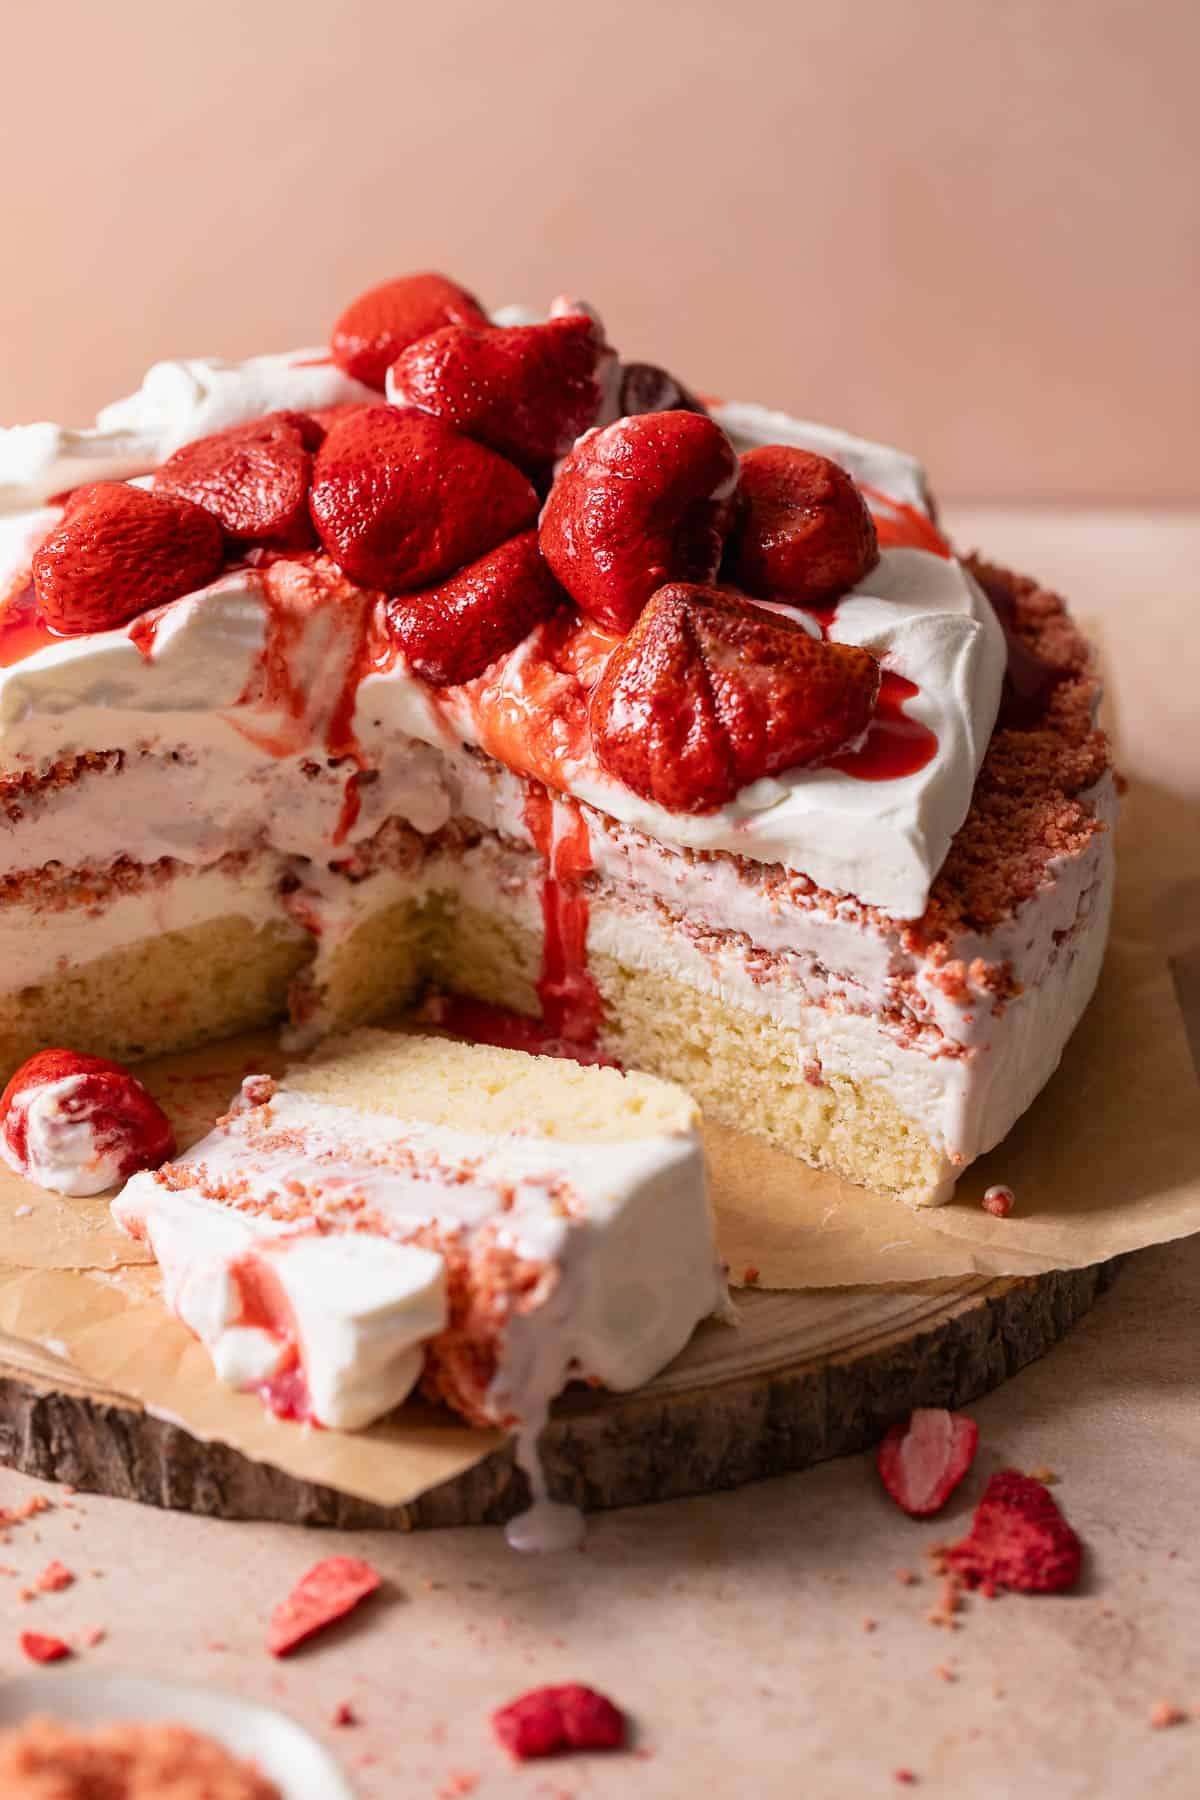
Inspired by my strawberry shortcake cookies, this strawberry ice cream cake is packed with strawberry flavor, plenty of ice cream, and two layers of crunchy strawberry crumble!
I used a few tricks I learned in pastry school to create an actual cake layer that is just as soft and moist frozen as it is at room temperature- no more cutting through rock-hard cake!
It’s easy to make, tastes even better than any store-bought or bakery version, and is perfect for birthday parties, summer barbeques, and beyond!
Try my mint chocolate chip ice cream cake for more fun flavors!
How to Make It
Step 1: Make the cake batter. Start by combining the oil and sugar, then the eggs and vanilla. Whisk in half of the dry ingredients, followed by the buttermilk, then the rest of the dries. Don’t overmix! (Image 1 below)
Step 2: Bake the cake layer. Spread the batter into the springform pan. You can also bake it in a standard 9″ cake pan. (Image 2 below)
Step 3: Cool the cake. Because the cake layer is thin, it will bake quickly! The top will not brown, so keep an eye on it. Once baked, let it cool on a wire rack. (Image 3 below)
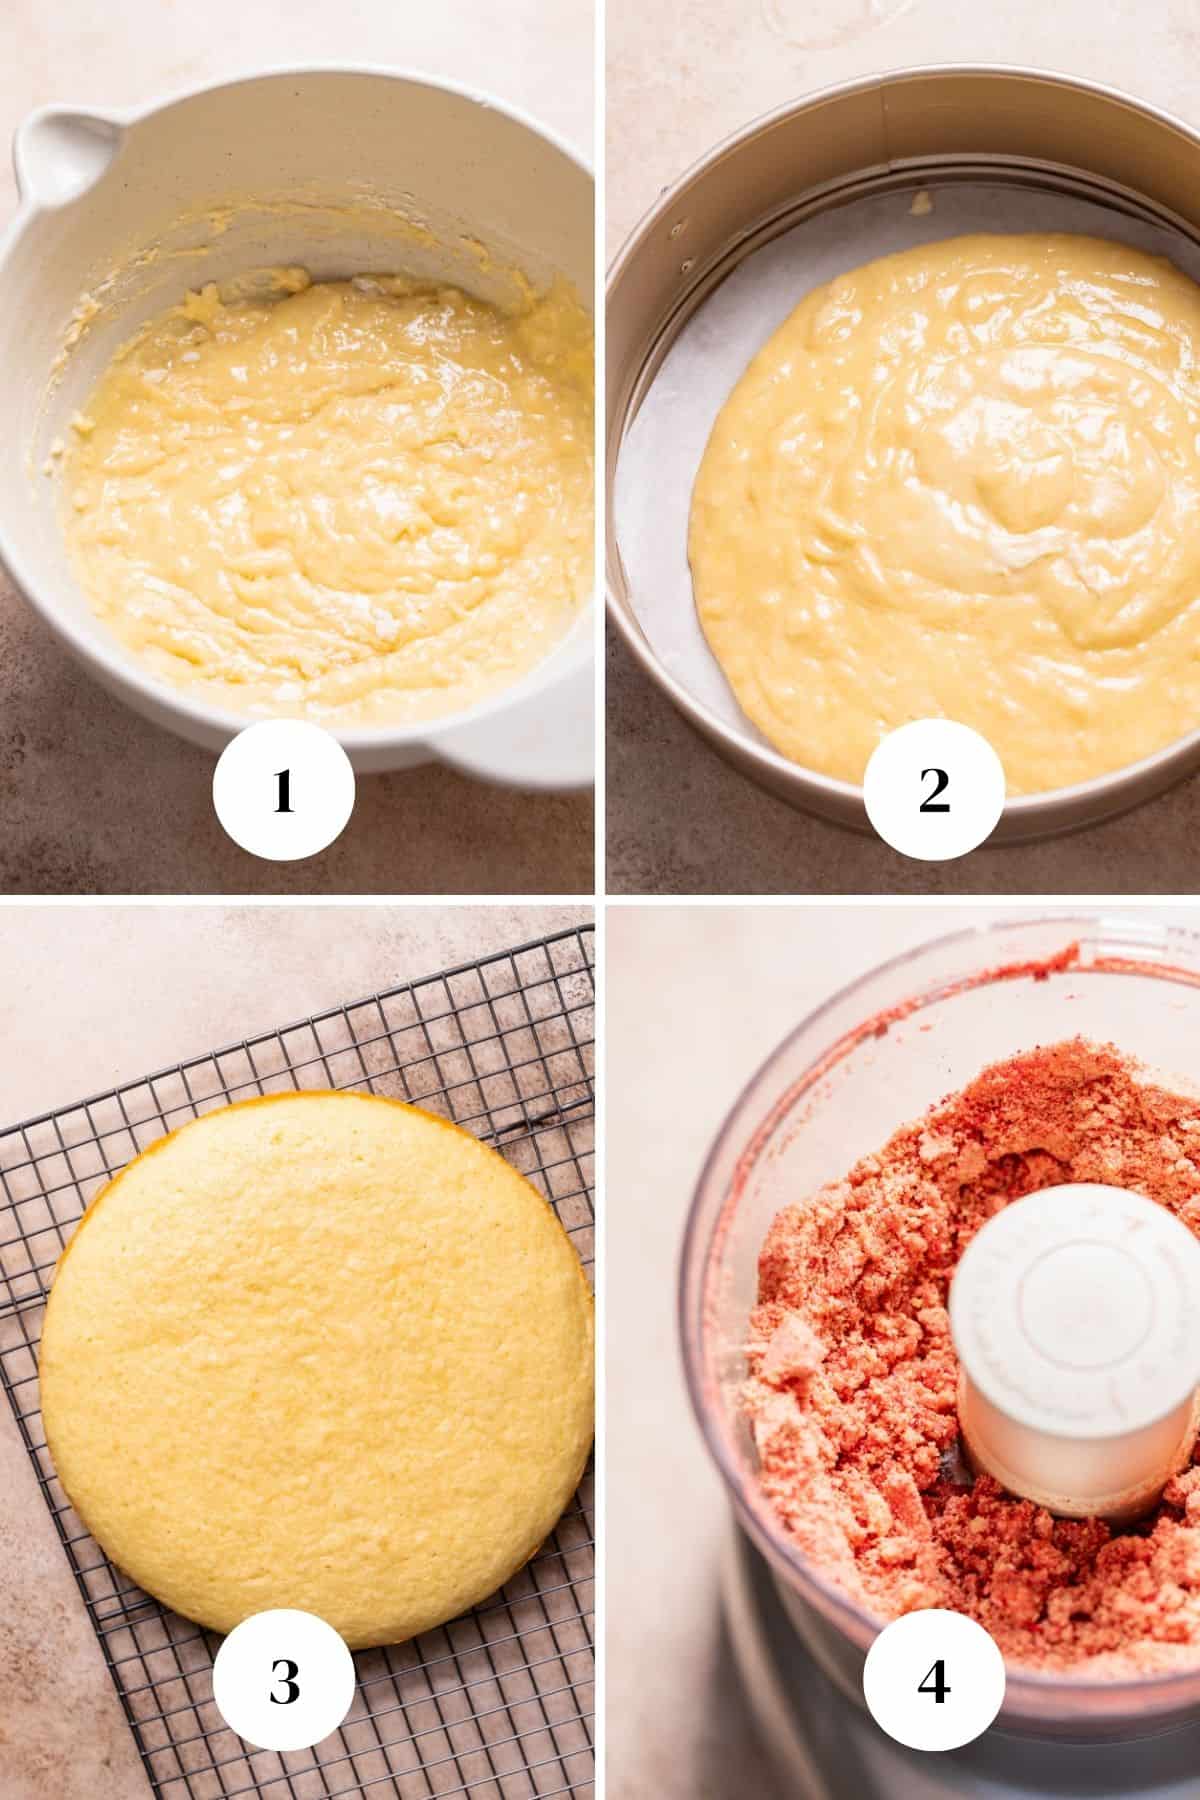
Step 4: Make the strawberry shortcake crumble. Process the Golden Oreos and freeze-dried strawberries until fine crumbs form, then drizzle in the melted butter. The butter will help keep the crumbs together so they don’t fall out when slicing! (Image 4 above)
Step 5: Line the pan with plastic wrap. This is very important and will keep the cake from sticking to the pan. You’ll need 2-3 strips of plastic wrap. Wrap each one around the sides of the pan and then clasp the bottom back in place. (Image 5 below)
Step 6: Spread the vanilla ice cream layer. Place the cake layer back into the pan and spread the softened vanilla ice cream on top. Cover with half of the strawberry crumble, gently pressing it into the ice cream. Freeze for at least 2 hours or until firm. (Image 6 below)
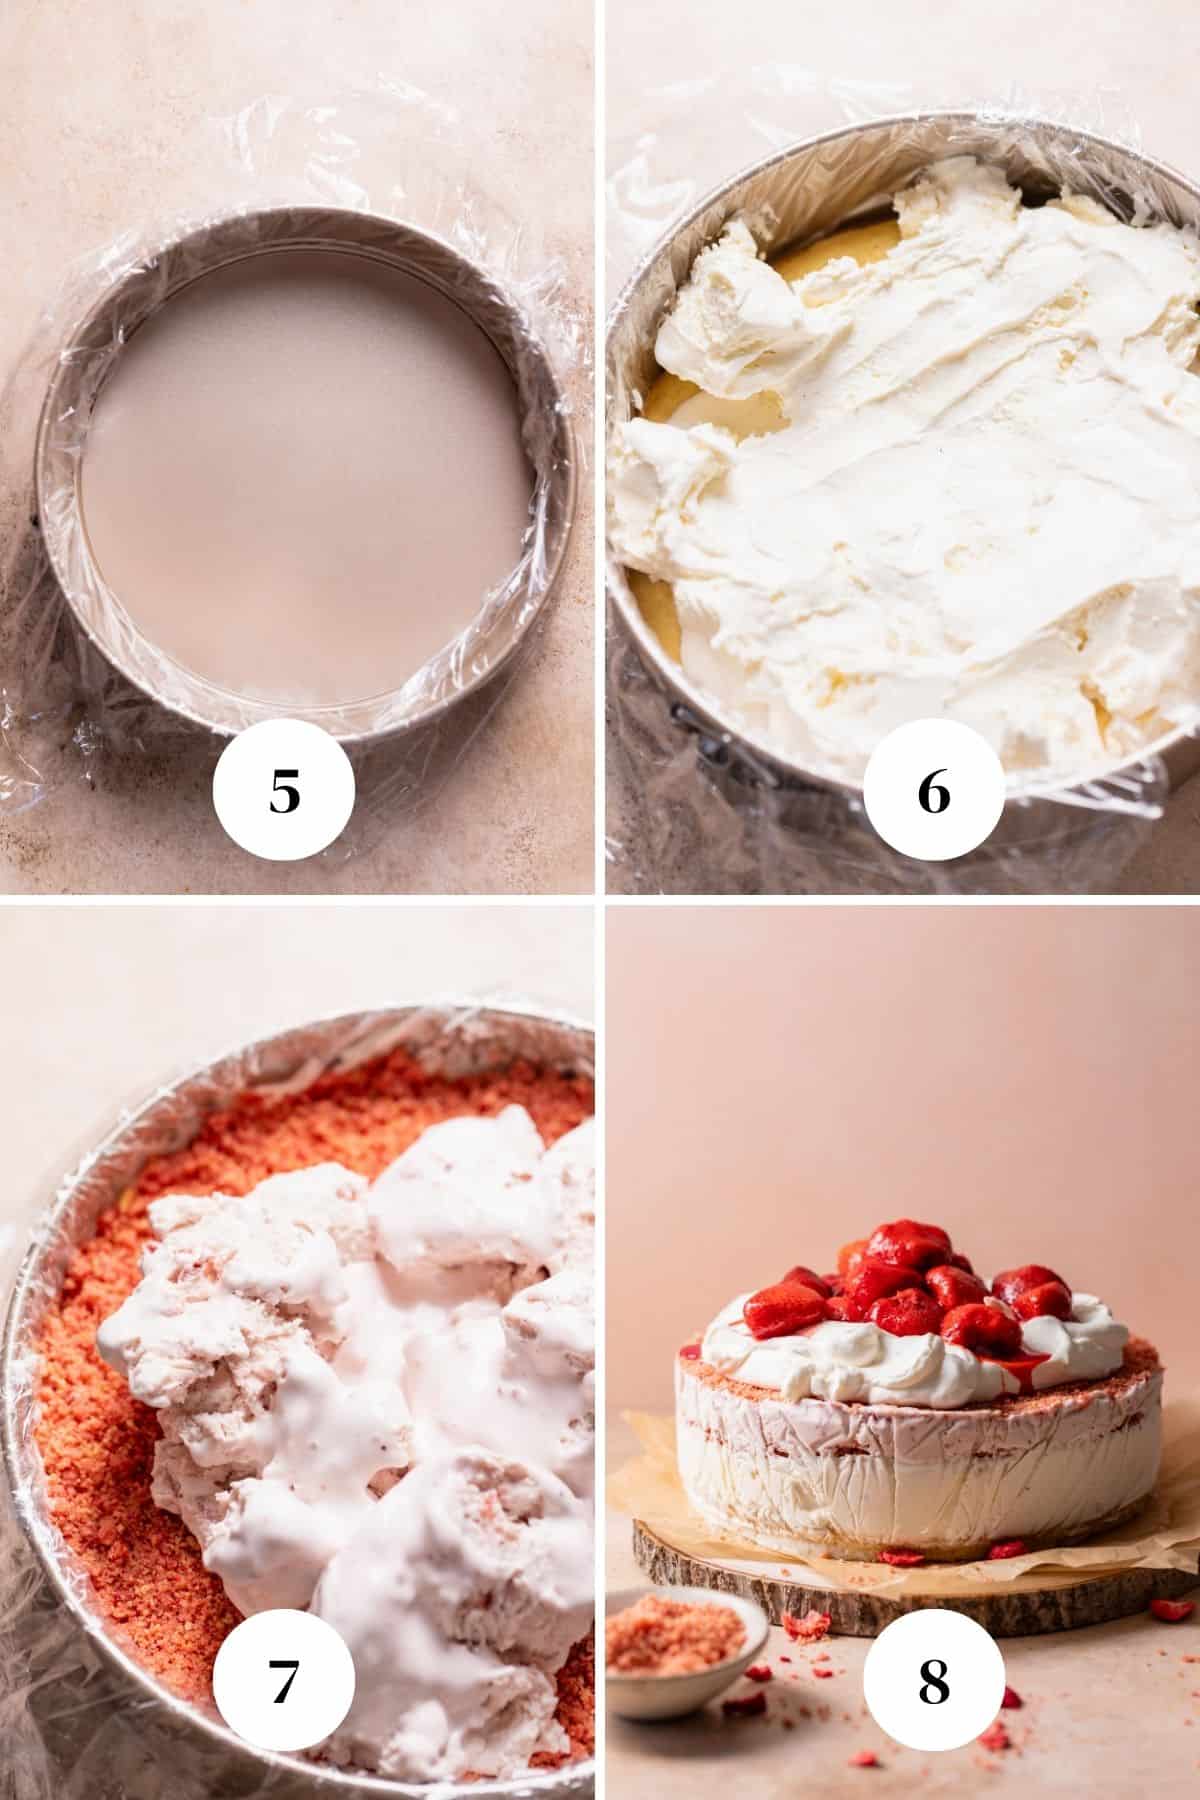
Step 7: Spread the strawberry ice cream layer. Spread the softened strawberry ice cream on top of the crumb layer. Then, spread the rest of the crumble on top. Return the pan to the freezer for a minimum of 4-6 hours. (Image 7 above)
Step 8: Decorate the cake! Garnish the top of the ice cream cake with homemade whipped cream and fresh strawberries, roasted strawberries, or extra shortcake crumbs. Then slice and serve! (Image 8 above)
If you tried this or any other recipe on my website, please let me know how it went in the comments; I love hearing from you! Also, please leave a star rating while you’re there! You can also tag me on Instagram or Facebook so I can check it out!
Strawberry Shortcake Ice Cream Cake
Equipment
- 9" springform pan
Ingredients
Strawberry Shortcake Crumble
- 24 Golden oreos
- 1 1/2 cups freeze dried strawberries
- 8 tablespoons unsalted butter, melted
Vanilla Cake
- 1 1/4 cups all purpose flour, *See notes below for measuring*
- 1 teaspoon baking powder
- 1/4 teaspoon fine sea salt
- 3/4 cup granulated sugar
- 1/4 cup canola oil
- 1 egg, room temperature
- 1 egg yolk, room temperature
- 1 tablespoon vanilla extract
- 1/2 cup buttermilk, room temperature
- Half of a 1.5 quart of vanilla bean ice cream, we used Tillamook Vanilla Bean
- Half of a 1.5 quart of strawberry ice cream, we used Tillamook Oregon Strawberry
Whipped Cream
- 1 cup heavy whipping cream
- 2 tablespoons powdered sugar
- 1 teaspoon vanilla extract
- Strawberries, for topping
Instructions
- Note before you start- clear out space in your freezer for the cake to chill!
- Line a 9” springform pan with parchment paper and butter the sides. Preheat the oven to 350°F/180°C.
- Pulverize the oreos and freeze dried strawberries in the bowl of a food processor. Once finely ground, stream in the melted butter and mix until crumbs form. Set aside.24 Golden oreos, 1 1/2 cups (30 g) freeze dried strawberries, 8 tablespoons (113 g) unsalted butter
- Whisk together the flour, baking powder, and salt. Set aside.1 1/4 cups (160 g) all purpose flour, 1 teaspoon baking powder, 1/4 teaspoon fine sea salt
- In a large bowl, whisk together the sugar and oil. Then, whisk in the egg, egg yolk, and vanilla. Whisk in half of the dry ingredients, when almost combined, whisk in the buttermilk. Then whisk in the rest of the dry ingredients.3/4 cup (150 g) granulated sugar, 1/4 cup (50 g) canola oil, 1 (50 g) egg, 1 (18 g) egg yolk, 1 tablespoon vanilla extract, 1/2 cup (115 g) buttermilk
- Pour the cake batter into the springform pan and bake until a toothpick inserted comes out with a few moist crumbs attached, about 15-20 minutes. Let cool on a wire rack. After 10 minutes, release the cake from the pan and remove it completely. Let it finish cooling on the rack.
- Wash the springform pan. Wrap 2-3 sheets of plastic wrap around the sides so the cake doesn’t stick to the pan. Clasp the bottom in place to secure the plastic wrap. See the video below for a visual aid! Note: Don’t wrap the bottom of the pan with plastic wrap or it will be hard to remove once assembled.
- When the cake is completely cool, remove the parchment paper and return the cake to the springform pan.
- Let the vanilla ice cream sit at room temperature for 20-25 minutes to soften, then spread it evenly on top of the cake layer. Sprinkle half of the shortcake crumbs evenly across the top, pressing them gently into the ice cream. Freeze for 2-3 hours or until it feels firm to the touch.(450 g) Half of a 1.5 quart of vanilla bean ice cream
- Then, let the strawberry ice cream sit at room temperature for 20-25 minutes. Spread it evenly on top of the crumb layer. Then, spread the remaining shortcake crumbs on top, pressing them gently into the ice cream. Return the cake to the freezer for a minimum of 4-6 hours.(450 g) Half of a 1.5 quart of strawberry ice cream
- Just before serving, whisk together the cream, powdered sugar, and vanilla extract until medium peaks form. When ready to serve, remove the cake from the freezer, remove the sides of the pan, and the plastic wrap. Spoon the whipped cream on top and freeze for 30 minutes until the whipped cream is firm. Garnish with fresh or roasted strawberries and serve immediately!1 cup (240 g) heavy whipping cream, 2 tablespoons powdered sugar, 1 teaspoon vanilla extract, Strawberries


Nothing says summer like a strawberry shortcake, and this one was delicious! Definitely making again!
Excellent! Cant wait to make this for my barbecue this weekend!